
The Splash Dash Tutorial

The game Splash Dash was my entry to a competition running from July to August 2024. In this article, I'm going to try to explain how it was made, line by line.
When I started writing this, I sort of forgot how difficult these projects are to explain. We will go into very extreme detail - but no pressure! Feel free to flick through it at your own pace.
<canvas id=c><script>for(p='(e,d)Q<17&!PeightO0,NNNWLr(KfoKJ=d:Ikey x,y =c.
/2
o.fill
Rect(+.),4,.1e==>S(e=innerd=(i-1
Styl"#+=-e)*u+H
A(d5,e
(d,e
A
)|
5)M[i-d)*u+W
,(&&(=Q=>*Math.sin(+1]==e. Codel=n=>{JW
widthWidth6,H
hOHO6,o
getContext`2d`,u=(W+H)
5,r=,l,f)=>l,u*f,u*fC=d,F=e,g&s?f=-.18:ef.007,h?d-=.1:qd.1t,KLKs=N9,WA
&! &!
)e%1<fF,s=1,f=0 )|A
|
|d<0|d5>70C, )f=NF)ePA
)&a
)>k[~~d*~~e]=1R=Nx=70;x--;)Jy=30;y--;)"+~(5x)-543A( )?K ,1):a( )>&yPk[x*y]ff0",Kx4,y41p/50+x+R++.3));JK-W,NWK7L034",L-m*W/5e3,H/9r
+f,.4r
Kd3,e0698",i=634;i-=2;o.lineTo(/9]+13))p?(]*>3(]02p*)-)
,~=~/9)&e>12&e<14?f/4:*=.97*<630-=]
5):M.push(N0);KN13,70
(R?++m>5e3?C:p9:T>4?t="#ff0":k=[T*=14,Tm=1],requestAnimationFrame(l)},f=g=h=q=s=u=T=m=p=Nk=[M=[]],t="#3897",S38|87?gI39|68?qI37|65?hINon down,1on upa(1+~~e,~~d,6d*e*9+T)+d5AaQ>Nl()';G=/[^!-HMR-~]/.exec(p);)with(p.split(G))p=join(shift());eval(p)</script>
Table Of Contents
∙ Coding the Game From Scratch
∙ Step 1. Setting Up
∙ Step 2. The Character
∙ Step 3. Blocks and Gravity
∙ Step 4. Tiny Collision
∙ Step 5. Jumping
∙ Step 6. Making Worlds
∙ Part 1. The Basic Formula
∙ Part 2. Adding Coins
∙ Part 3. Simulating Water
∙ Part 4. Playable Levels
∙ Part 5. Final Details
∙ Once Last Golf
Introduction
Code golfing - you might have heard the term before. If you haven't, let me clarify that we're talking about a different kind of golf. "Code Golfing" is the art of condensing a code program into the smallest possible space. Code programs have the potential to be massive, but when you golf them you are - in effect - guiding that golf ball into the hole. You're aiming for the perfect, most concise combination of letters to create a functional but extremely compact code program.
The smallest unit of memory is a bit. A single letter is made of 8 bits, which is called a byte. One day, a programmer said to another programmer: "The goal is, one thousand bytes to make a game." And that's code golfing.
To explain how small a 1k game really is, I'm going to use the example of the standard iPhone. At the time of writing, it has the capacity to store about 256 gigabytes of data. If every game in the world only took up one kilobyte of memory, you would potentially be able to store one million of them on your iPhone alone. Here's a zoom-out of how many games that would be.
I can't imagine there are many people who would actually want a million games on their iPhone, but that's beside the point.
In the past, programmers had to be good at code golfing because their computers didn't have as much memory as they do now. Pretty much the only reason why it still exists nowadays is because it makes people "feel good". It's just something about having a few of lines of code, and knowing it's the basis for a complete, playable game - where every letter and every symbol is part of the reason why the game exists.
Coding the Game From Scratch
Before and during the competition, I set myself the challenge of making a decent platformer in the smallest possible amount of bytes. The rest of this article will explain the entire development of Splash Dash.
Step 1. Setting Up
We're going to start with an empty HTML file. That's the language every website thinks in, so even if we're want to write in JavaScript, we have to initialise it with HTML.
To start off, let's create a canvas and open JavaScript. An HTML canvas, like the name suggests, allows us to figuratively "draw" things on the screen. In our case, we're going to draw our game onto the canvas.
<canvas id=c></canvas> // Make a canvas
<script></script> // Initialise JavaScript
The <script> tags allow us to start writing in JavaScript. Let's create a function that runs every single frame. This will allow us to progressively render the game onto the canvas, instead of simply drawing a static image.

To visualise this, consider how a flipbook works. It's made of a series of "frames," and by flipping the pages we can get a decent animation. Similarly, instead of drawing a single "frame" onto our canvas, we need to keep updating it to allow for an interactive game.
#<script>

l=_=>{ // Initialise the update loop
requestAnimationFrame(l) // Update the loop every frame
}
l() // Start running the loop when the game starts

#</script>
In the code above, we create a function called l (short for loop), we tell the computer to run this function every frame by using requestAnimationFrame(), and finally we begin running our funtion as soon as the game starts.
Inside the update loop, let's make the screen responsive by setting the dimensions of the canvas to the dimensions of the browser window. We will also create the context. The context is the figurative "paintbrush" that allows us to draw things on the canvas.
#l=_=>{

// Get the dimensions of the canvas, while at the same time setting its dimensions
W=c.width=innerWidth-16
H=c.height=innerHeight-16

#requestAnimationFrame(l)
#}

// Initialise the 2d context. Backticks mean we don't need to use brackets
X=c.getContext`2d`

#l()
That's the set up done - we've created the canvas, the paintbrush, and a function that runs every 60th of a second. But we still just have a blank screen! Let's add the player!
Step 2. The Character
In most cases, getting the main character sorted early on is a good idea. Because I was trying to use as few bytes as possible, I created a very simple box figure with eyes and feet. The former had to be sacrificed because of addition of the water simulation.
#l=_=>{
#W=c.width=innerWidth-16
#H=c.height=innerHeight-16

// Get the average size of the webpage by adding the width and height together
z=(W+H)/25

// Make a function the draws rectangles
r=(x,y,s)=>X.fillRect((x-d)*z+W/2,(y-e)*z+H/2,z*s,z*s)

X.fillStyle='#034' // Body colour
r(d,e,.4) // Body
r(d,e+.4,.1) // Left foot
r(d+.3,e+.4,.1) // Right foot

#requestAnimationFrame(l)
#}
#X=c.getContext`2d`

// Define the X and Y coordinates of the player
d=e=0

#l()
There are quite a lot of additions in the code above, so let's break it down. Before we run the update loop, we define the x and y positions of the player, stored as d and e.
In the update loop, we create a simple function can draw squares on the screen. Since every shape in the game is a square and is drawn based on the player position - which also happens to be the camera's - the function only needs three arguments: x, y, and size. All drawing and offsetting is calculated in the function.
After we create the function r(x, y, s), we can draw the player with hardly any code. We set the fill style of the player to determine its colour, and then we simply draw the body and feet based on d and e. I've repeated the relevant code below. Take a look at the commented areas if you don't understand.
// Make a function the draws rectangles
r=(x,y,s)=>X.fillRect((x-d)*z+W/2,(y-e)*z+H/2,z*s,z*s)

X.fillStyle='#034' // Body colour
r(d,e,.4) // Body
r(d,e+.4,.1) // Left foot
r(d+.3,e+.4,.1) // Right foot

Step 3. Blocks and Gravity
Now we have a basic character, we can start designing the world it inhabits. Let's write a small patch of code to create some ground.
#r=(x,y,s)=>X.fillRect((x-d)*z+W/2,(y-e)*z+H/2,z*s,z*s)
// Set the fill colour to orange
X.fillStyle='#f80'
for(x=70;x--;){ // Start at 70 and count down
for(y=30;y--;){ // Start at 30 and count down
if(y)r(x,y,.9) // Draw blocks
}
}
#X.fillStyle='#034' // Body colour
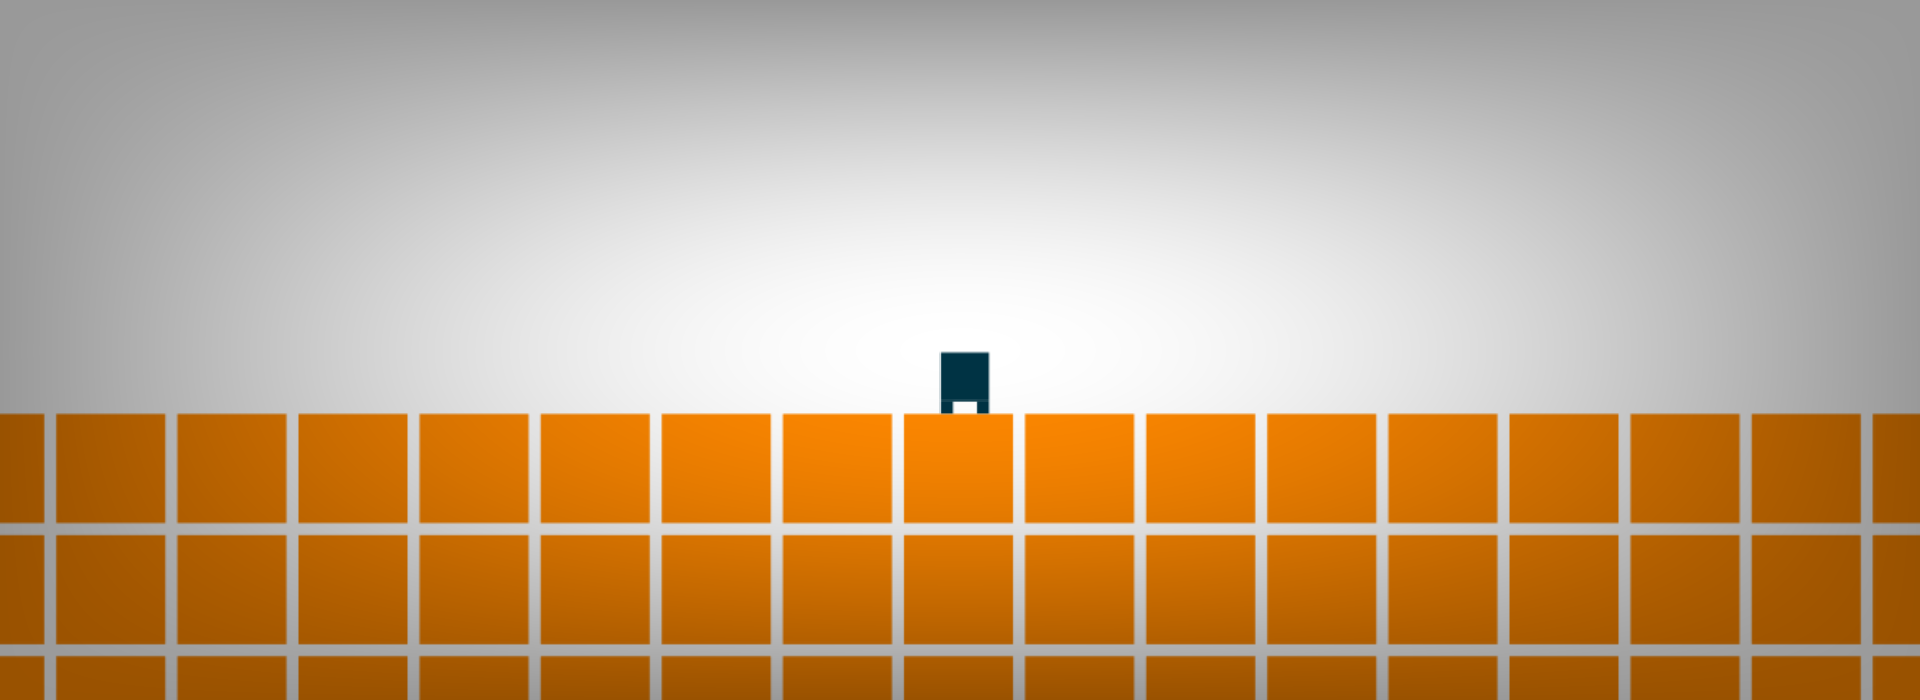
#r(d,e,.4) // BodyThis is what it should look like so far.

Things are taking shape! At the moment, the main character is static, and can't move. The following code snippet includes checks for arrow or WASD keyboard inputs, which allows for player movement.
#l=_=>{
#W=c.width=innerWidth-16
#H=c.height=innerHeight-16

// Move player
h?d-=.1:j?d+=.1:0

#(...)

#}
#X=c.getContext`2d`

// Define new variables
d=e=g=h=j=0

// Detect key presses
P=(e,b)=>e.keyCode==38|e.keyCode==87?g=b:e.keyCode==39|e.keyCode==68?j=b:e.keyCode==37|e.keyCode==65?h=b:0
onkeydown=e=>P(e,1)
onkeyup=e=>P(e)

#l()
The above code adds three new variables: g, the up key, which we will use shortly, h, the left key, and j, the right key. These numbers are 1 when their corresponding key is pressed, but zero any other time.
Back in the update loop, we check whether the left or right key is pressed, and then move the player's x position accordingly. A very compact alternative to writing if and else, is by using the ? and : operators. In effect, h?d-=.1:j?d+=.1:0 does exactly the same thing as this:
if (h == true) {
    d -= .1
}

else if (j == true) {
    d += .1
}
If you run the code so far, you'll realise that the player can move left and right, but doesn't fall onto the ground. This calls for the addition of gravity. Here's the implementation of that.
#l=_=>{
#W=c.width=innerWidth-16
#H=c.height=innerHeight-16

// Moved player based on gravity
e+=f+=.007
#h?d-=.1:j?d+=.1:0

#(...)

#}
#X=c.getContext`2d`

// Add a new number "f"
d=e=g=h=j=f=0

#P=(e,b)=>e.keyCode==38|e.keyCode==87?g=b:e.keyCode==39|e.keyCode==68?j=b:e.keyCode==37|e.keyCode==65?h=b:0
#onkeydown=e=>P(e,1)
#onkeyup=e=>P(e)

#l()
The new variable f refers to the y velocity or "fall speed" of the player. Every frame, we make this y velocity increase by a small amount, and make the y position of the player increase based in this velocity. This gives us a simple but effective illusion of gravity.
Step 4. Tiny Collision
One of the most difficult parts of a platform game is what is known as "Collision Response". Collision response is the maths that stops the main character from falling through the ground. So it's pretty important. If you run the code above, you will notice that the player has no interaction with the orange blocks.
The more edges you add to a collision response calculation, the harder the maths becomes. For example, let's say we have an infinite stretch of perfectly flat ground. Let's visualise that.
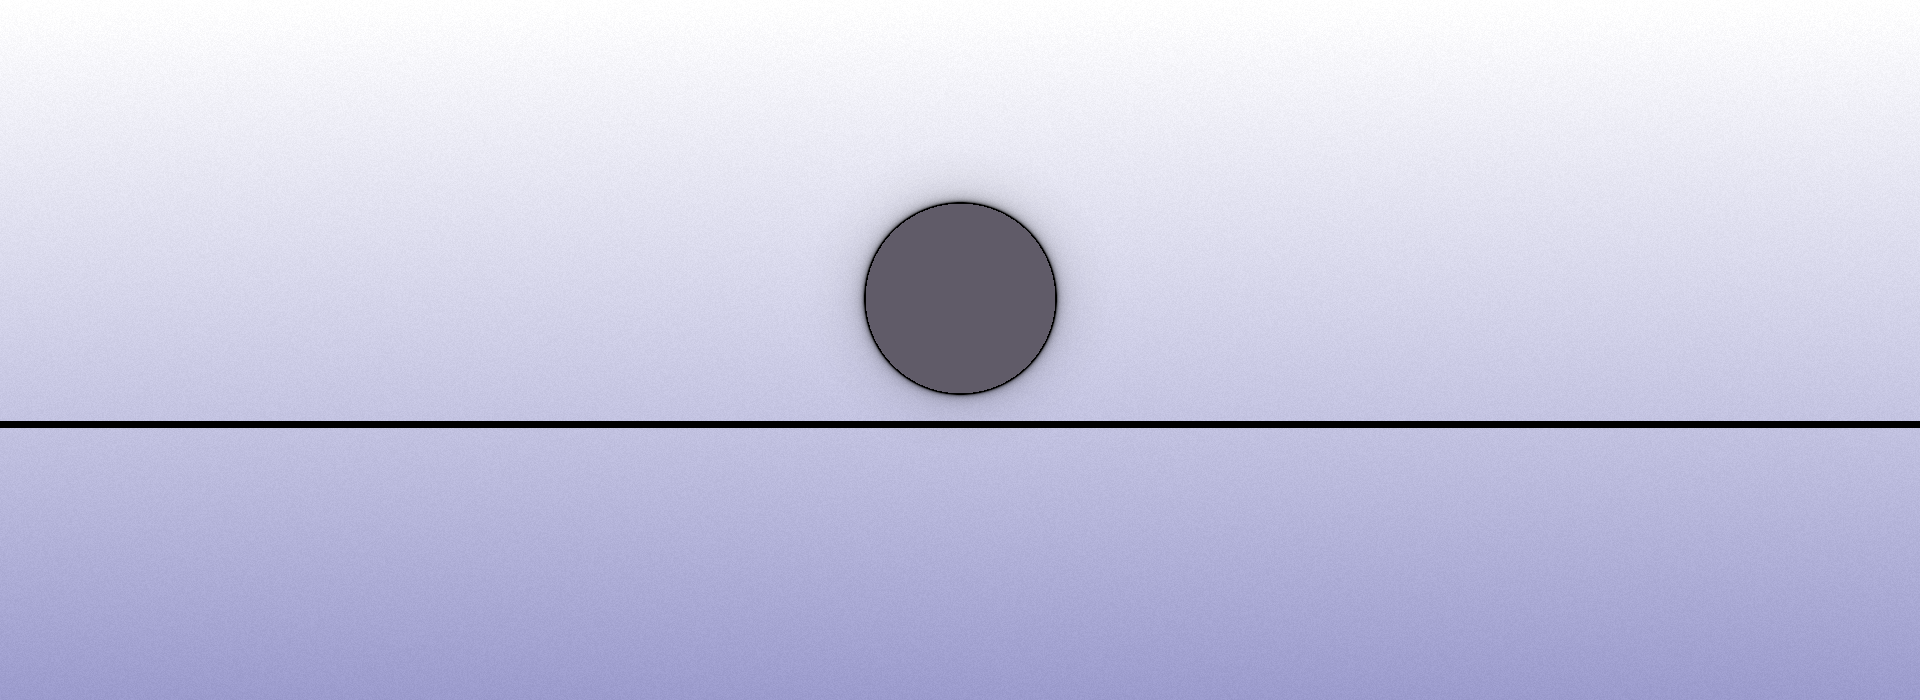
For the falling ball to have collision with the ground, we would simply use the following calculation: If the ball is too low, place it on the ground.
 if (ballY > groundY)
    ballY = groundY
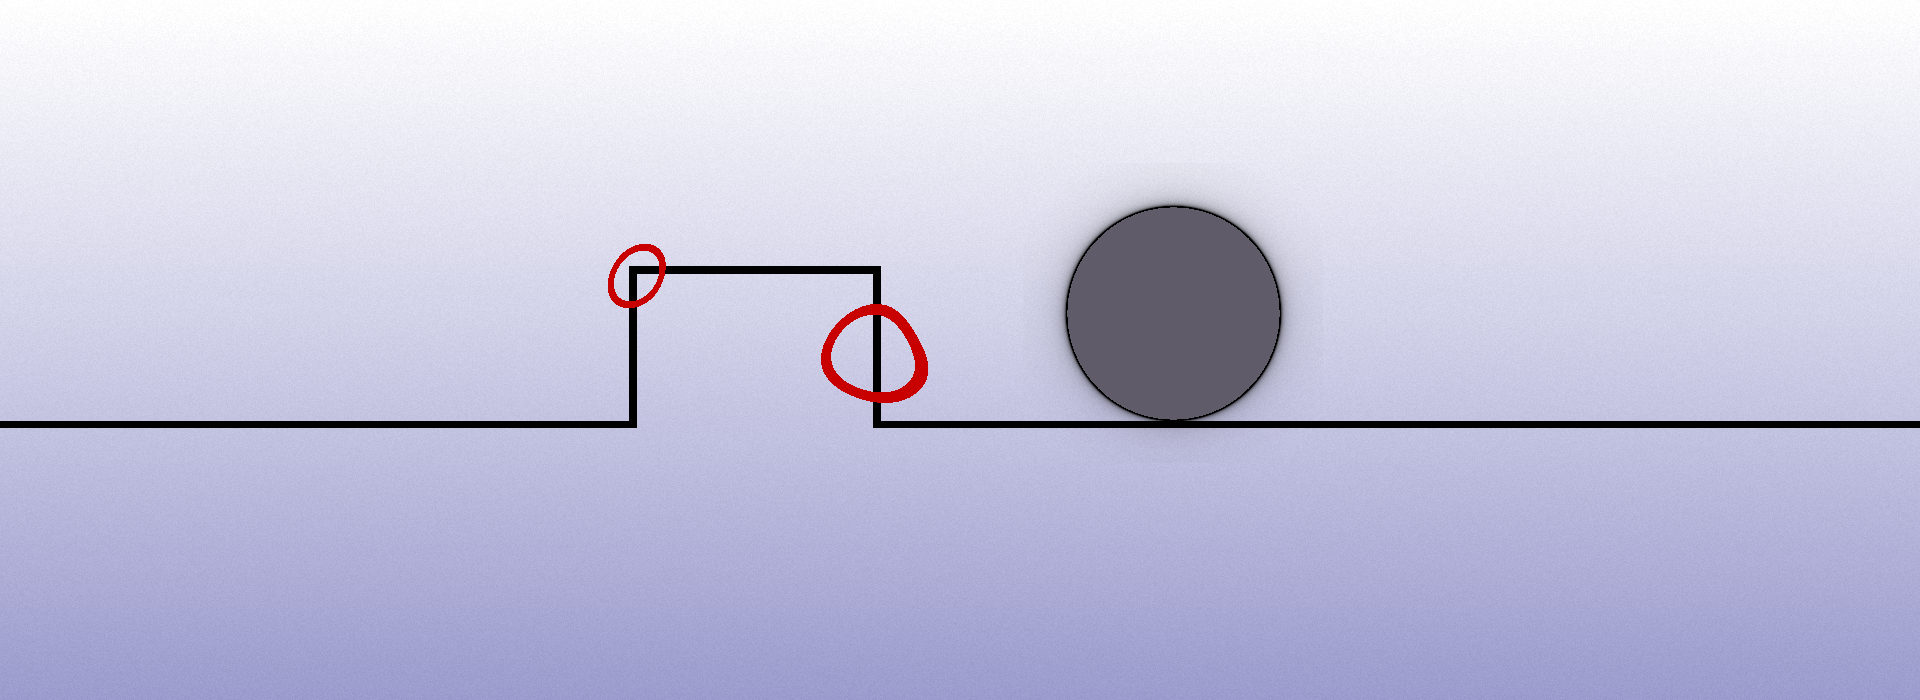
But if we alter the line slightly, we are already faced with two problems, both of which have been circled in the image below.
With our current calculation, if the ball rolls onto the side of the jut, it will instantly jump to the top. And if it hits a corner, we would expect it to bounce off at a diagonal. So already we're having to go into pretty advaced maths to figure out a system that not only detects what part of the line the ball is intersecting with, but also determining a valid amount by which the ball should be moved away.
In the end, I decided to go with the simplest approach, although admittedly not a very accurate one. Here's a summary of what the code needs to do.
• If the player is touching a block:
• Move the player to its previous position
The issue with this approach is the fact that the faster the player is moving the less accurate the results will be. Where the player should have simply been pushed to the side of the block, his position is reset all the way back to where he was a frame ago. But we're dealing with 1 kilobyte here, so it doesn't matter.
The code below makes the player have good collision response with each block. Notice how we store the previous position of the player by getting his position before we move it.
#W=c.width=innerWidth-16
#H=c.height=innerHeight-16

// Get current player pos
D=d
E=e

#e+=f+=.007
#h?d-=.1:j?d+=.1:0

#z=(W+H)/25
#r=(x,y,s)=>X.fillRect((x-d)*z+W/2,(y-e)*z+H/2,z*s,z*s)

// Detect and resolve collision
A(d,e+.5)&!A(d,e)|A(d+.5,e+.5)&!A(d+.5,e)&&(e+.5)%1<f&&(e=E,f=0) // Ground
A(d,e)|A(d+.5,e)|A(d,e+.5)|A(d+.5,e+.5)|d<0|d+.5>70&&(d=D,A(d,e)|A(d+.5,e)&&(f=0,e=E)) // Wall and Ceiling

#X.fillStyle='#f80'
#for(x=70;x--;){
#    for(y=30;y--;){

#(...)

#onkeydown=e=>P(e,1)
#onkeyup=e=>P(e)

// Create two new functions that return based on given block coordinates
a=(x,y)=>{x=~~x,y=~~y;return y}
A=(x,y)=>a(x,y)>0
#l()
If you run the code above you'll realise that the player now collides with the ground. So what's changed? At the top of the update loop, we get the previous player position. Further down, we detect collision by checking the cells around the player. Before we get into how the collision actually works, I'm going to take a minute to explain what our two new functions do, a(x, y) and A(x, y).
The new a(x, y) function we created rounds given coordinates down to a whole number - that's what the ~~ means - and returns a value for the current position. What does that mean?
I'm going to ask you to think abstract for a moment. Consider this: each block in our game has a size of one. Let's say our player is at x coordinate 3.5 and y coordinate 2.1, and a block has its top-left corner at x coordinate 3 and y coordinate 2.
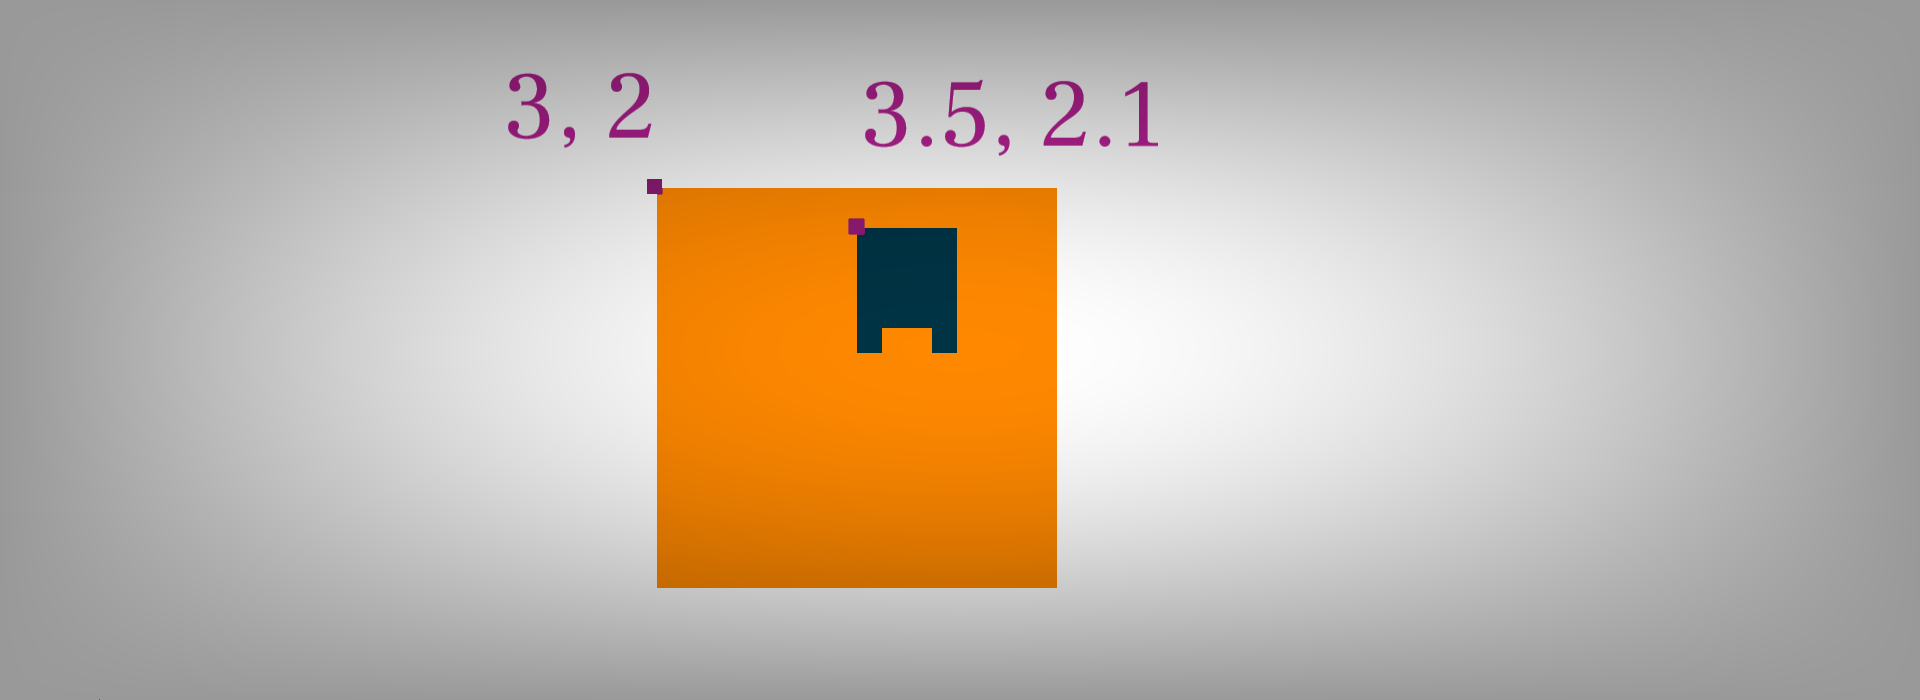
To check if the player is colliding with the block, we simply round the player's position down to the nearest whole number. After that, all you need to do is check if the player's rounded position matches the block's position. This is a very simple way to check collision with blocks that are ordered in a grid. In fact, a similar technique was used in the game Io's Mission.
Anyway, back to the code. Let's review the two functions again.
// Create two new functions that return based on given block coordinates
a=(x,y)=>{x=~~x,y=~~y;return y}
A=(x,y)=>a(x,y)>0
The a(x, y) function is given a set of coordinates, rounds the coordinates down to determine which block we're dealing with, and then returns a number. This "returned number" represents whether the original coordinates are colliding with a block or not. If they are, the function will return a number above zero. If they're not, it will return a number that is zero or under.
Since our world is just a stretch of flat ground, all we need to do is return the y position of the block. That's what the function is doing where it says return y.
The first row of blocks - where the player starts - has a y coordinate of 0, and we know there aren't any blocks there. But for the remaining rows, since their y position will always be greater than zero, the computer will recognise them as blocks that need to be collided with.
The A(x, y) function detects if the coordinate should be a block or not by simply checking if our a(x, y) function returns a number above than zero.
That was the complicated part! Now we can get back to the code in the update loop, where we actually do the calculations for block collision.
// Get current player pos
D=d
E=e

// Move the player
e+=f+=.007
h?d-=.1:j?d+=.1:0

#(...)

// Detect and resolve collision
A(d,e+.5)&!A(d,e)|A(d+.5,e+.5)&!A(d+.5,e)&&(e+.5)%1<f&&(e=E,f=0) // Ground
A(d,e)|A(d+.5,e)|A(d,e+.5)|A(d+.5,e+.5)|d<0|d+.5>70&&(d=D,A(d,e)|A(d+.5,e)&&(f=0,e=E)) // Wall and Ceiling
Let's take the first line, which detects if the player is standing on the ground. I'm going to translate it progressively, but if you don't understand, don't worry! The break-down below is basically explaining how the code detects when the player is standing on the ground.
A(d,e+.5) If the bottom left cell just under the player is a solid block...
Remember the player is only half the size of a block, so we use .5 to access the block below him.
&!A(d,e) and the top left of the player is not ! touching anything...
Remember JavaScript works from the top left, so d and e refer to the top left of the player.
|A(d+.5,e+.5) or the bottom right cell
just below the player is a solid block...
&!A(d+.5,e) and the top right of the
player is not touching anything...
&&(e+.5)%1<f Then - that's what the && means - if the player's current y position plus his fall speed is enough to actually touch the blocks underneath him...
&&(e=E,f=0) Then we finally know for sure that the player is on the ground. We revert his y position to what it was on the frame before, and we set his y velocity (or "fall speed") to zero, because - naturally - he's not falling anymore.
If you want to understand the second line, I'm going to leave it for you to break down by yourself. If you're really stuck, feel free to ask in the comment section at the end of this page.
Step 5. Jumping
Well, this is quite an easy section - a little intermission for you!
Understandably, the player shouldn't be able to jump from mid-air, but has to be standing on something beforehand. Since we now know when the player is on the ground, we can add this ability. Let's update our code!
<canvas id=c></canvas>
<script>
#l=T=>{
#W=c.width=innerWidth-16
#H=c.height=innerHeight-16

#D=d
#E=e

// Implement jump
g&v?f=-.18:e+=f+=.007
h?d-=.1:j?d+=.1:0

#z=(W+H)/25
#r=(x,y,s)=>X.fillRect((x-d)*z+W/2,(y-e)*z+H/2,z*s,z*s)

// Before collision, say the player is in the air
v=0

// Update collision
A(d,e+.5)&!A(d,e)|A(d+.5,e+.5)&!A(d+.5,e)&&(e+.5)%1<f&&(e=E,v=1,f=0)
#A(d,e)|A(d+.5,e)|A(d,e+.5)|A(d+.5,e+.5)|d<0|d+.5>70&&(d=D,A(d,e)|A(d+.5,e)&&(f=0,e=E))

#X.fillStyle='#f80'
#for(x=70;x--;){
#    for(y=30;y--;){
#        if(y)r(x,y,.9) // Draw blocks
#    }
#}

#X.fillStyle='#034' // Body colour
#r(d,e,.4) // Body
#r(d,e+.4,.1) // Left foot
#r(d+.3,e+.4,.1) // Right foot

#requestAnimationFrame(l)
#}
#X=c.getContext`2d`

// Add a new number "v"
d=e=g=h=j=f=v=0

#P=(e,b)=>e.keyCode==38|e.keyCode==87?g=b:e.keyCode==39|e.keyCode==68?j=b:e.keyCode==37|e.keyCode==65?h=b:0
#onkeydown=e=>P(e,1)
#onkeyup=e=>P(e)

#a=(x,y)=>{x=~~x,y=~~y;return y}
#A=(x,y)=>a(x,y)>0
#l()
</script>
The above code adds a new variable v, which is a number representing whether the player is on the ground or not. If the player is on the ground and the up key is pressed, we can change his y velocity.
Notice that on the line where we detect ground collision, we've added the code v=1. Consequently, v is 1 when the player is on the ground, and zero any other time.
While we're at it, let's make the jump slightly more interesting by springing the character's body up a little. This is not complicated, since we already know the player's y velocity, f.
#X.fillStyle='#034' // Body colour
r(d,e+f,.4) // Body
#r(d,e+.4,.1) // Left foot
#r(d+.3,e+.4,.1) // Right foot
Step 6. Making Worlds
Out of everything in Splash Dash's the development, I think making the levels was the most enjoyable part. It was really amaizing to see how it all came together at the end.
Part 1. The Basic Formula
Naturally, being a project designed to be as small as possible, manually designing each world wasn't an option. I had to think of a formula that would generate worlds that not only looked good, but would also be fun and - more importantly - possible to play.
The first stage was to make the formula. Before we start, we need to make a small improvement to the code that draws blocks on the screen. Instead of writing if(y)r(x,y,.9), we can now use our fancy A(x, y) function to make it mokre consistent.
We've also learned that we can use the shorthand ? and : operators instead of if.
X.fillStyle='#f80'
for(x=70;x--;){
    for(y=30;y--;){
        A(x,y)?r(x,y,.9):0 // Draw blocks
    }
}
I fiddled around for quite some time getting the formula right, but it still felt like a fluke when I finally got a good one - sometimes trial and error is the only option! After a while, I stumbled upon the code shown below. I've edited the a(x, y) function because that's the thing that says whether a given coordinate should be a block or not.
If we want to generate worlds, we just distort these coordinates so that the returned number gives us a nice looking surface.
a=(x,y)=>{x=~~x+1,y=~~y;return (Math.sin(y*x*9)*6)+y-15}Further up un our update loop, we can also give these blocks more natural colours.
for(x=70;x--;){
    for(y=30;y--;){
        X.fillStyle='#'+~(Math.sin(x)*5-543) // Random number representing hexadecimal values
        A(x,y)?r(x,y,.9):0
    }
}
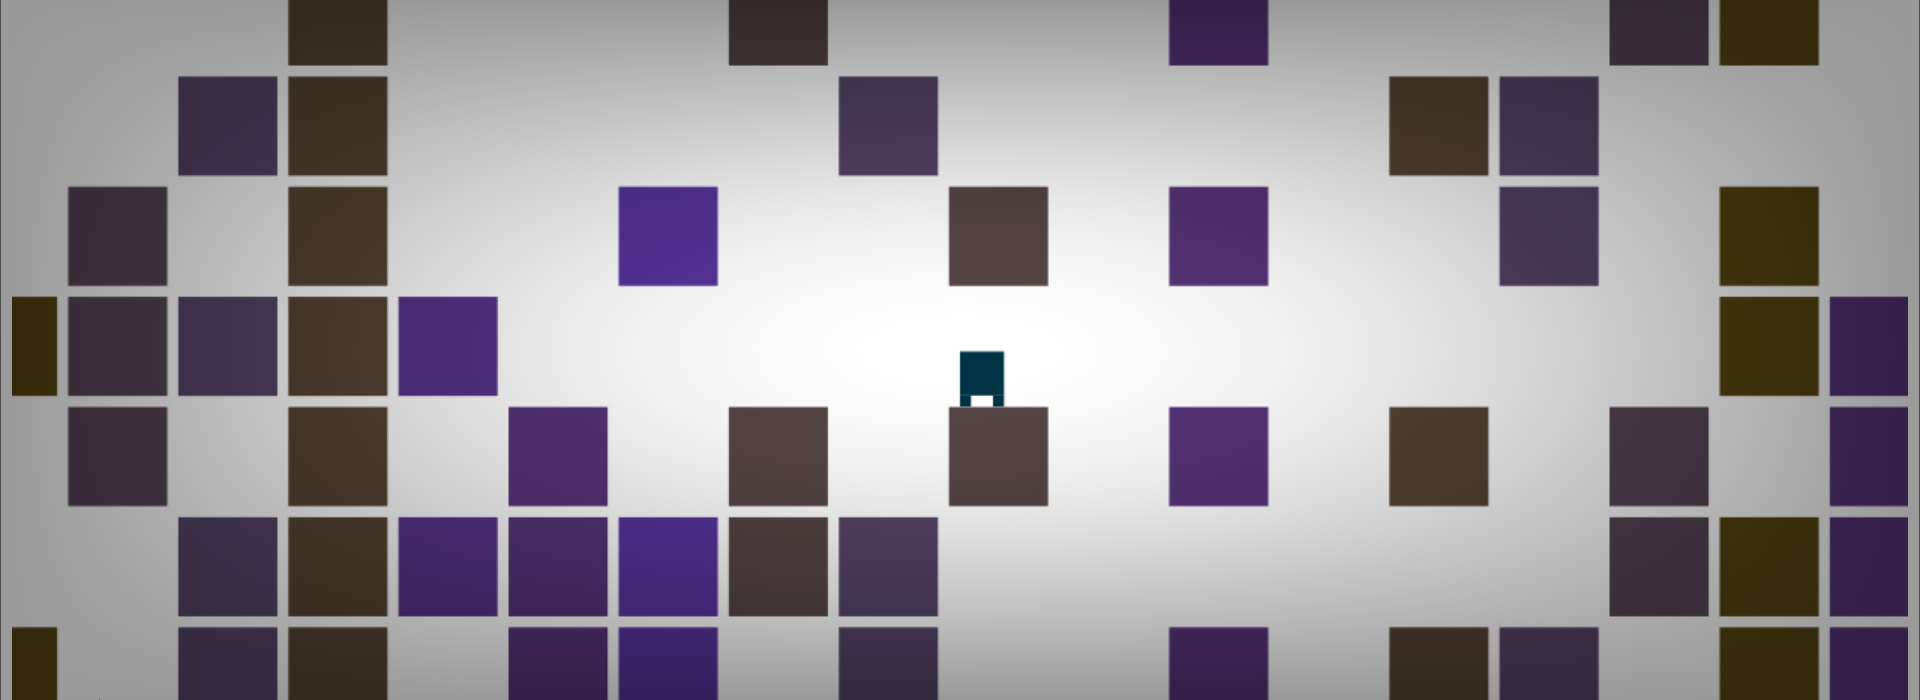
It's not looking too bad! I thought the generation formula was completely sorted at this point, but I later realised it needed some tweaking. Let's not worry about that for now though, and push ahead with adding some coins!
Part 2. Adding Coins
Let's first of all get these coins on the screen, and then we can think about how the player collects them.
We can use our function a(x, y) to decide whether a coin should be placed on a block or not.
#for(x=70;x--;){
#    for(y=30;y--;){
#        X.fillStyle='#'+~(Math.sin(x)*5-543)
        A(x,y)?r(x,y,.9):a(x,y)>-1&y<17&&(X.fillStyle='#bb0',r(x+.4,y+.4,.3))
#    }
#}
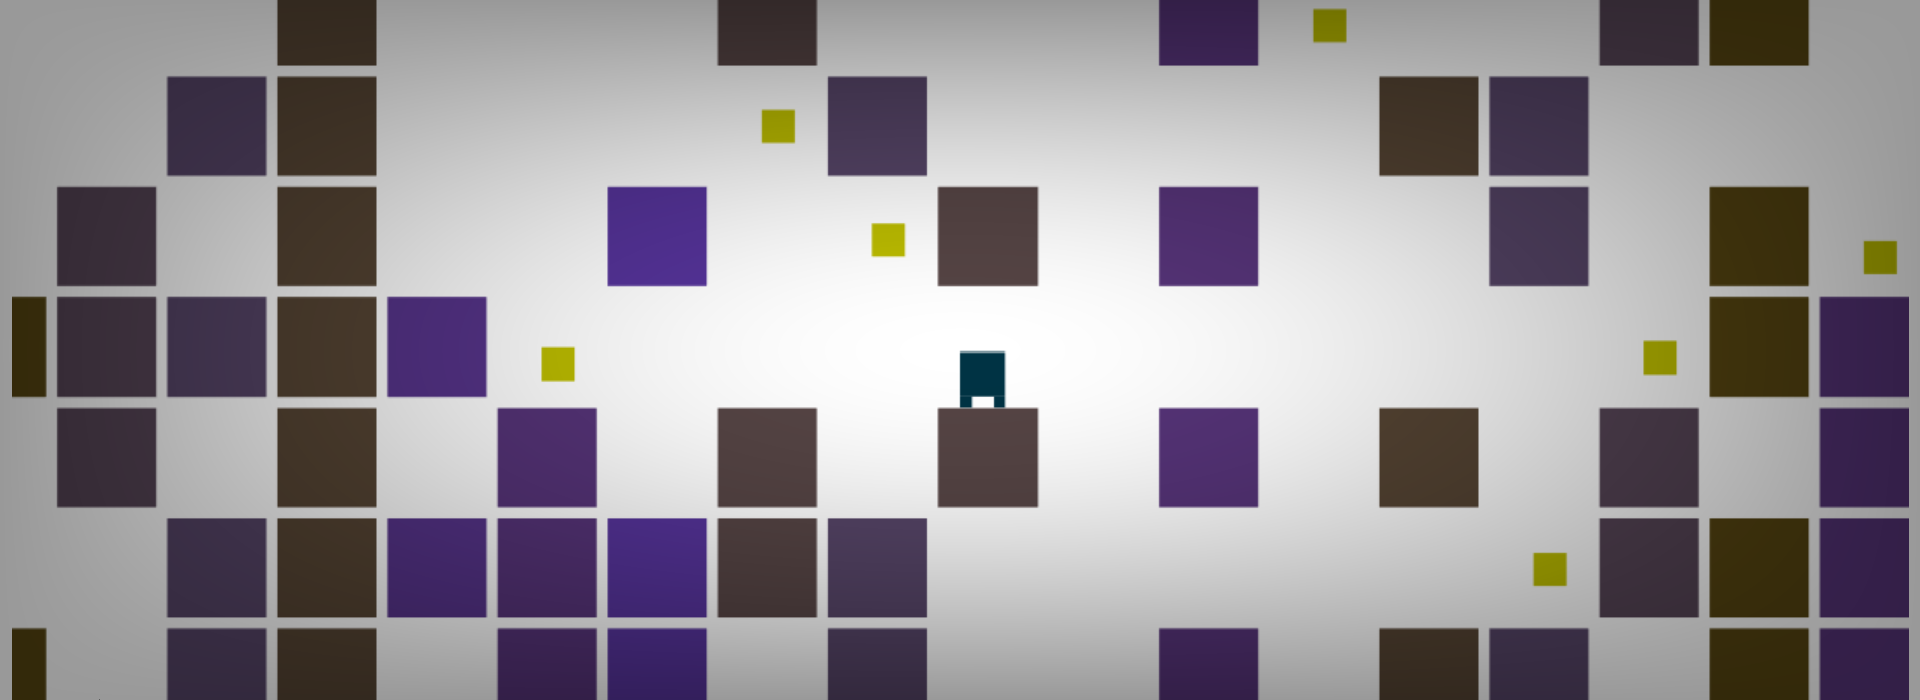
Well, they look a bit like coins, so that should be enough for now.
In the code above, we added a check to decide whether a coin should be placed or not. Do you remember earlier, we checked if a block should be placed if our function a(x, y) returned a number that was greater than zero? In a similar way, the code above checks if a coin should be placed if the returned number is greater than minus one. We make sure coins are never placed inside blocks by putting it after the : operator, which in this case means else. In effect, the code above is doing this:
if (number > 0)
    // Draw block

else if (number > -1)
    // Draw coin
Finally, to prevent coins from being created to low down, we added &y<17, which ensures that coins are never created after the 16th row.
Unlike a lot of features in this game, coins have to be stored. That means, where all the blocks in the world are solely calculated based on their position, the thing that decides if a coins exists is based on whether the player has collected it or not.
Because of this, we need to create our first array - or "list" - that allows us to keep track of all the coins that the player has touched.
#d=e=g=h=j=f=v=0

// Create an array to store collected coins
k=[]

#P=(e,b)=>e.keyCode==38|e.keyCode==87?g=b:e.keyCode==39|e.keyCode==68?j=b:e.keyCode==37|e.keyCode==65?h=b:0
#onkeydown=e=>P(e,1)
#onkeyup=e=>P(e)
Just after we resolve block collision, we can check if the player is touching a coin. This check uses the same method we used to draw the coins on the screen. Further down the code, we can add the line &!k[x*y] to make sure collected coins aren't drawn.
#A(d,e+.5)&!A(d,e)|A(d+.5,e+.5)&!A(d+.5,e)&&(e+.5)%1<f&&(e=E,v=1,f=0) // Ground
#A(d,e)|A(d+.5,e)|A(d,e+.5)|A(d+.5,e+.5)|d<0|d+.5>70&&(d=D,A(d,e)|A(d+.5,e)&&(f=0,e=E)) // Wall and Ceiling

// Coin collision
e<17&a(d,e)>-1&&(k[~~d*~~e]=1)

#for(x=70;x--;){
#    for(y=30;y--;){
#        X.fillStyle='#'+~(Math.sin(x)*5-543)

        // Only draw coin if it hasn't been collected
        A(x,y)?r(x,y,.9):a(x,y)>-1&y<17&!k[x*y]&&(X.fillStyle='#bb0',r(x+.4,y+.4,.3))
#    }
#}
While we're at it, let's make the coins float by animating their y position...
#for(x=70;x--;){
#    for(y=30;y--;){
#        X.fillStyle='#'+~(Math.sin(x)*5-543)
        A(x,y)?r(x,y,.9):a(x,y)>-1&y<17&!k[x*y]&&(X.fillStyle='#bb0',r(x+.4,y+.4+Math.sin(_/50+x)*.1,.3))
#    }
#}
Part 3. Simulating Water
Now for the water simulation! The technique used in the game is probably the simplest form of water possible. It involves having a row of "points," which can move up and down based on their neighbour's y position.
The fundamental structure of this kind of water simulation is that all points are trying to reach equilibrium. If an adjacent point is higher or lower than the first one, the first point will speed up or slow down accordingly to balance with its neighbour.

Before we implement that, let's see what it looks like to add some flat water to the world.
#r(d,e+.4,.1)
#r(d+.3,e+.4,.1)

// Make a blue rectangle
X.fillStyle='#0698'
r(0,13,70)

#requestAnimationFrame(l)

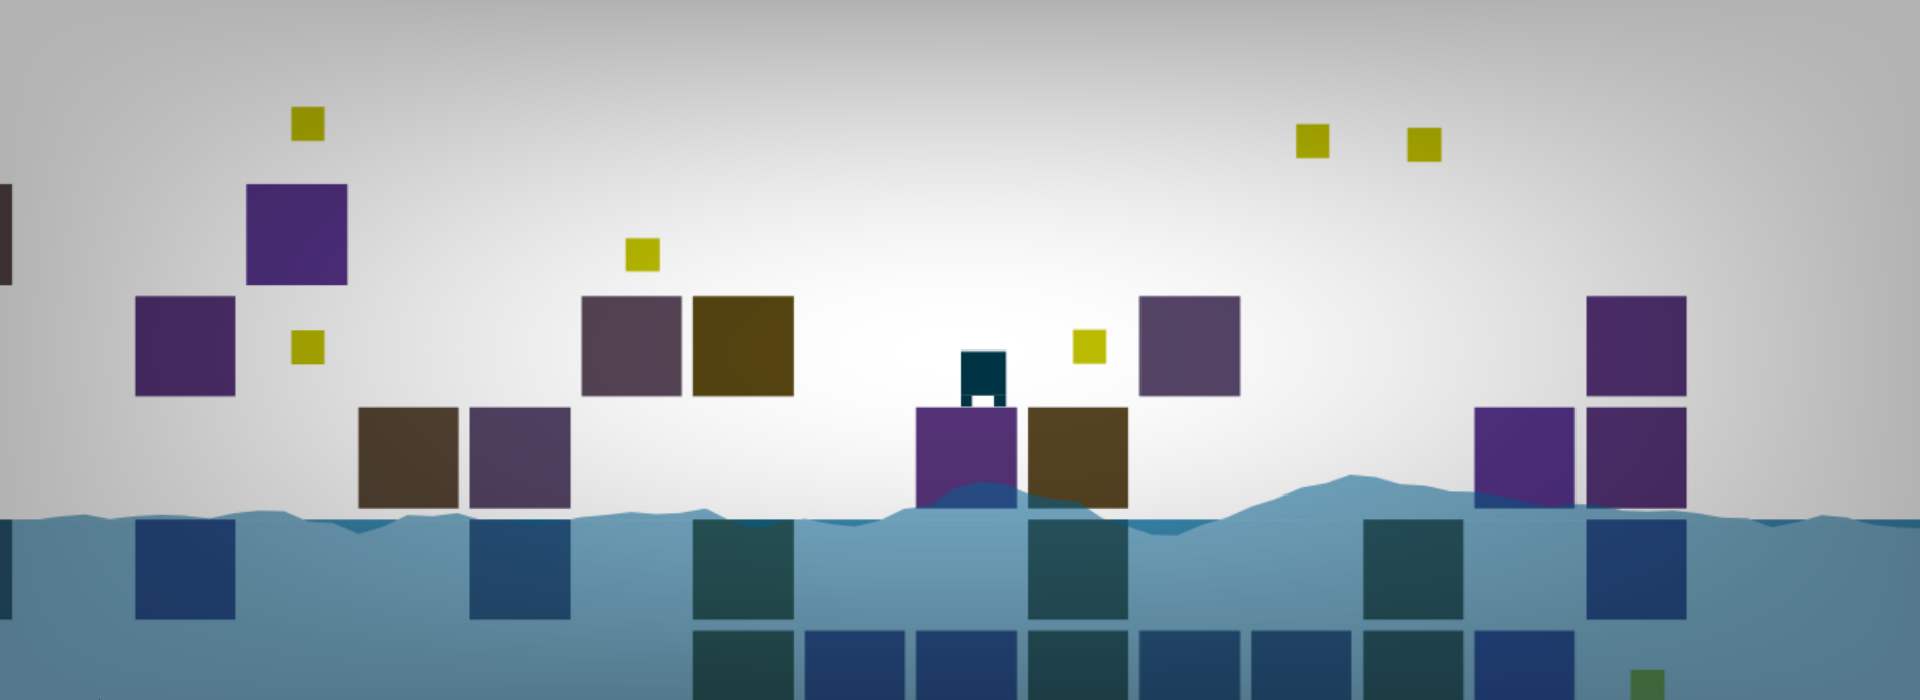
The bulk of the water looks okay, but the surface needs to be more fluid. In the code above, we simply created a transparent blue rectangle and rendered it on top of everything. Let's implment the method we described in the outset of this section.
#r(d,e+.4,.1)
#r(d+.3,e+.4,.1)

X.fillStyle='#0698'

// Run through all 317 water points and draw them on the screen
for(i=634;i-=2;X.lineTo((i/9-d)*z+W/2,(J[i]+13-e)*z+H/2)){
// A the start of the program, fill the array with numbers
if(!_)J.push(0,0)

// Calculate the water simulation and detect player collision
else{
J[i]+=J[i+1]*(i>3)
J[i+1]+=(J[i-1]+Math.sin(_*J[i+1])*.02-J[i+1])/2
~d==~(i/9)&e>12&e<14?J[i+1]+=f/4:J[i+1]*=.97*(i<630)
J[i+1]-=J[i]/25
}}

r(0,13,70)

// Draw the water surface on the screen
X.fill()

#requestAnimationFrame(l)
#}
#X=c.getContext`2d`

#d=e=g=h=j=f=v=0

// Create an array called J to store the water
k=[J=[]]
It works, but what's the code doing? First, we create a new array - J - to store all the points for the surface of the water. In the update loop, we run a process that starts at 634 and counts down by two after every run. What does that mean?
The method used in the code is known as a "for-loop". A for-loop can allow you to run a process multiple times, with a number representing which "run" it's on. In our case, we started our number at 634 and counted down in twos until we reached zero.
for(i=634;i-=2;)
Then we checked how long the game had been running for. The code said that if the game was on the first frame, fill our water array with points. Otherwise, calculate and render the water on the screen.
if(!_)J.push(0,0)
else{
J[i]+=J[i+1]*(i>3)
J[i+1]+=(J[i-1]+Math.sin(_*J[i+1])*.02-J[i+1])/2
~d==~(i/9)&e>12&e<14?J[i+1]+=f/4:J[i+1]*=.97*(i<630)
J[i+1]-=J[i]/25
}
Let's break that down.
J[i]+=J[i+1]*(i>3)
Basically, our array stores two values for each water point: the y position and the speed. J[i] is accessing the relevant y position by getting array's contents at the current "index" of the for-loop. +=J[i+1] makes the y position increase or decrease based on its speed. The last part, *(i>3), is trivial, but solves a small glitch at the side of the world.
J[i+1]+=(J[i-1]+Math.sin(_*J[i+1])*.02-J[i+1])/2
The code above manipulates the point's speed. By default, the speed is zero, which means the water will be perfectly flat and static. When the speed changes, the y position of the point will also change, as we described earlier.
I won't go into too much detail, but essentially this piece of code just adds a bit of randomisation to the surface of the water. If you played the game, did you notice that the water seemed to ripple on its own? This is the code that's making that happen.
~d==~(i/9)&e>12&e<14?J[i+1]+=f/4:J[i+1]*=.97*(i<630)
This line of code deals with player collision and water damping. Let's go into that with a bit more detail.
~d==~(i/9) This code checks if the x position of the player - d - is in a similar place to the given water segment. Remember, i is our for-loop's run count, so we can use it to get the x position of the water. Since all water segments are layed out in a row with an equal distance between them, it's easy to check if the player is in line with one of them.
The i/9 is a quick way of getting the relative position of the water segment. The width of the whole world in our game is 70 blocks. The amount of water segments in our world is 634. So we do the calculation 634 ÷ 70, and we get something very close to 9. This means that roughly 9 water segments can fit inside a block. Since our player's position is based on the size of a block, i/9 gives us a good approximation.
&e>12&e<14? Here we check if the player's y position is near the sea level. We're not bothering to do a proper collision check because the water will always be hanging around the 13th row of blocks, give or take a few. At the end of this piece of code we end the if statement with a ?, because we now have enough information to conclude that the player has collided with the water.
J[i+1]+=f/4 This code makes the water segment's y velocity match the y velocity of the player. This means that if the player is falling, the water will splash downwards, but if he's jumping out of the water, it'll go up instead.
:J[i+1]*=.97*(i<630) You can probably figure out this line. Without it, any movement in the water would repeat forever with equal force. However, because we constantly decrease the water's speed every frame, the surface can gradually calm down.
J[i+1]-=J[i]/25
Even though it may look simple, this last line is a rather important one. It's the thing that keeps the water hanging around the same place. If the y position of the water is too low, the speed of the water tries increasingly hard to push it up. When the water segment is too high, the speed pushes it down.
The implementation of a water simulation may seem complicated, but as long as you keep reminding yourself of the basic principle that water is always trying to reach equalibrium, it should be quite easy to implement in code.
One line I didn't discuss was the actual drawing of the water. Let's take a minute to understand that. It's quite simple.
X.lineTo((i/9-d)*z+W/2,(J[i]+13-e)*z+H/2)
The code might look a bit overwhelming, but a large part of it is changing the coordinates based on the camera position and scale. Because none of that is very helpful for explanitory purposes, I'm going to simplify the above code to this:
lineTo(i/9,J[i]+13)
Well, that's a bit easier to understand! The x position of our water segment is i/9 to ensure that each block holds about nine segments. The code J[i]+13 positions the water based on its stored y position, plus the number 13 to prevent the sea level from being too high up.
Part 4. Playable Levels
At the moment, the player is just navigating around a single world. To add multiple worlds, we'll first need to check if the player has collected all the coins and then increase the seed. We'll go into that a bit more shortly.
Here is the code for checking if all the coins have been collected. See if you can figure out how it works.
// Make a number to count the remaining coins
K=0

#for(x=70;x--;){ // Start at 70 and count down
#    for(y=30;y--;){ // Start at 30 and count down
#        X.fillStyle='#'+~(Math.sin(x)*5-543)

        // Increase the coin count
        A(x,y)?r(x,y,.9):a(x,y)>-1&y<17&!k[x*y]&&(X.fillStyle='#bb0',r(x+.4,y+.4+Math.sin(_/50+x+K++)*.1,.3))
#    }
#}

#(...)


// Detect when there are no more coins left and reset the player's position
!K?(d=e=1):0

#requestAnimationFrame(l)
#}
In the code above, we run a check to see if there are any remaining coins. We do this by adding to a number when a coin is drawn. If the number is zero, we know there aren't any more coins. To save a few bytes, we incremented this number by inserting +K++ to the code that makes the coins float.
Now for generating the next level. A key feature of generating levels is using a seed. A seed is a code for a randomly generated world - depending on what this "seed" is set to, the resulting world will be different.
Let's add a seed to our level generation formula so that we can generate different worlds every time.
// Increase the seed and clear the collected coins array
!K?k=[Q+=d=e=1]:0

#requestAnimationFrame(l)
#}
#X=c.getContext`2d`

// Create the world seed called "Q"
d=e=g=h=j=f=v=Q=0

#k=[J=[]]

#P=(e,b)=>e.keyCode==38|e.keyCode==87?g=b:e.keyCode==39|e.keyCode==68?j=b:e.keyCode==37|e.keyCode==65?h=b:0
#onkeydown=e=>P(e,1)
#onkeyup=e=>P(e)

// Apply seed to level
a=(x,y)=>{x=~~x+1,y=~~y;return (Math.sin(y*x*9+Q)*6)+y-15}
#A=(x,y)=>a(x,y)>0

#l()
Before we run the update loop, we define a new variable to represent the seed, called Q. In our a(x, y) function, we add this "seed" to the formula.
Further up in our update loop, we clear the collected coins array and increment our seed by 1. This will make the level automatically switch to a different world, as our a(x, y) function will now return different numbers.
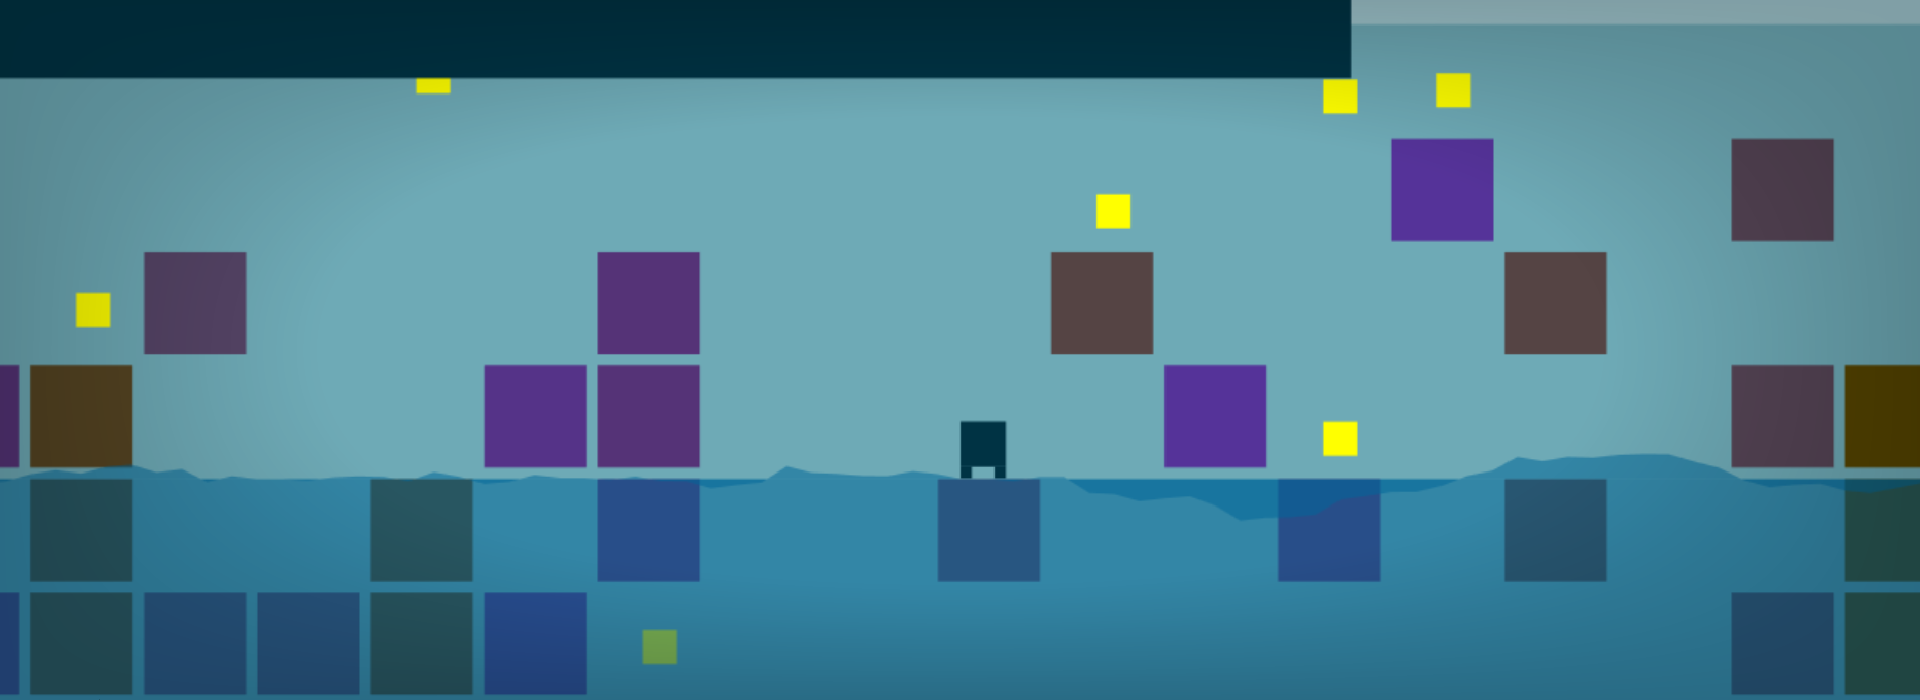
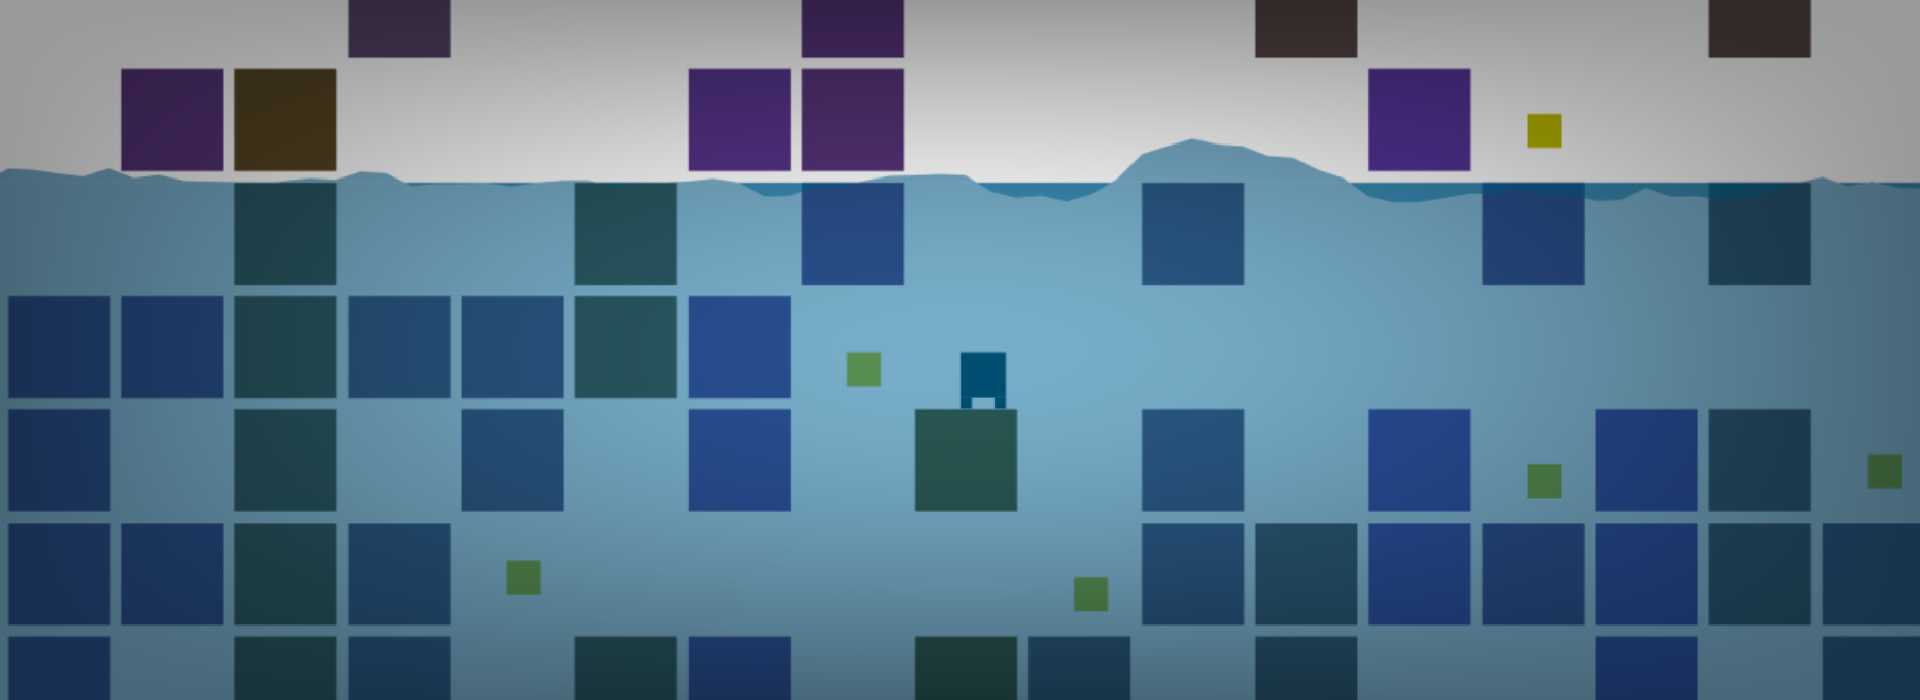
The program not changes worlds! Since our game needs a few levels, I've taken a screenshot of the first three levels for us to analyse. This is the first level, where the seed is zero.
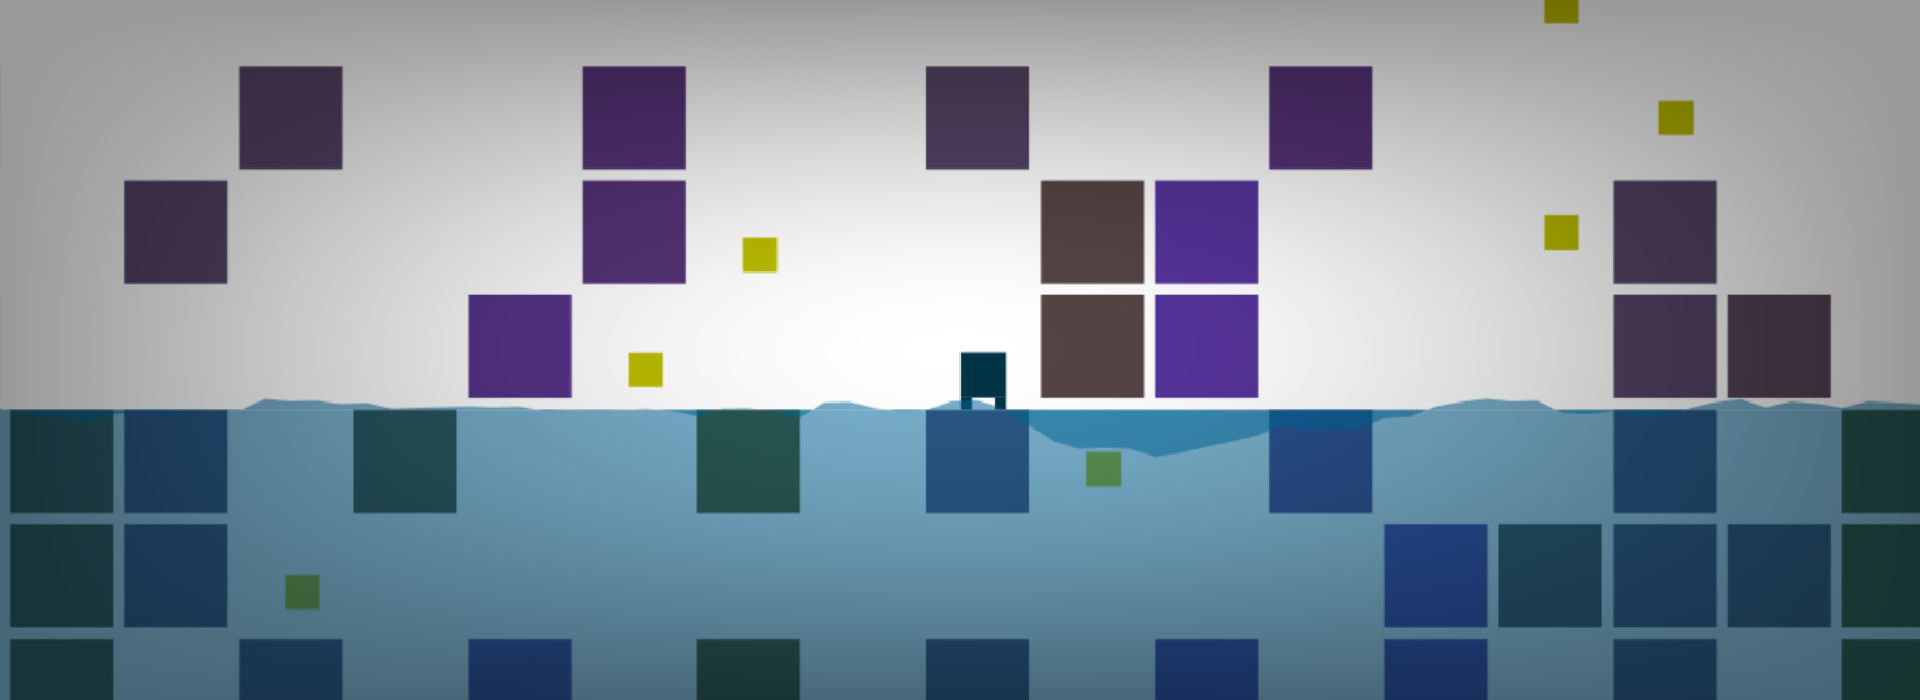
The seed is incremented by one to give us the next level. It looks pretty good!
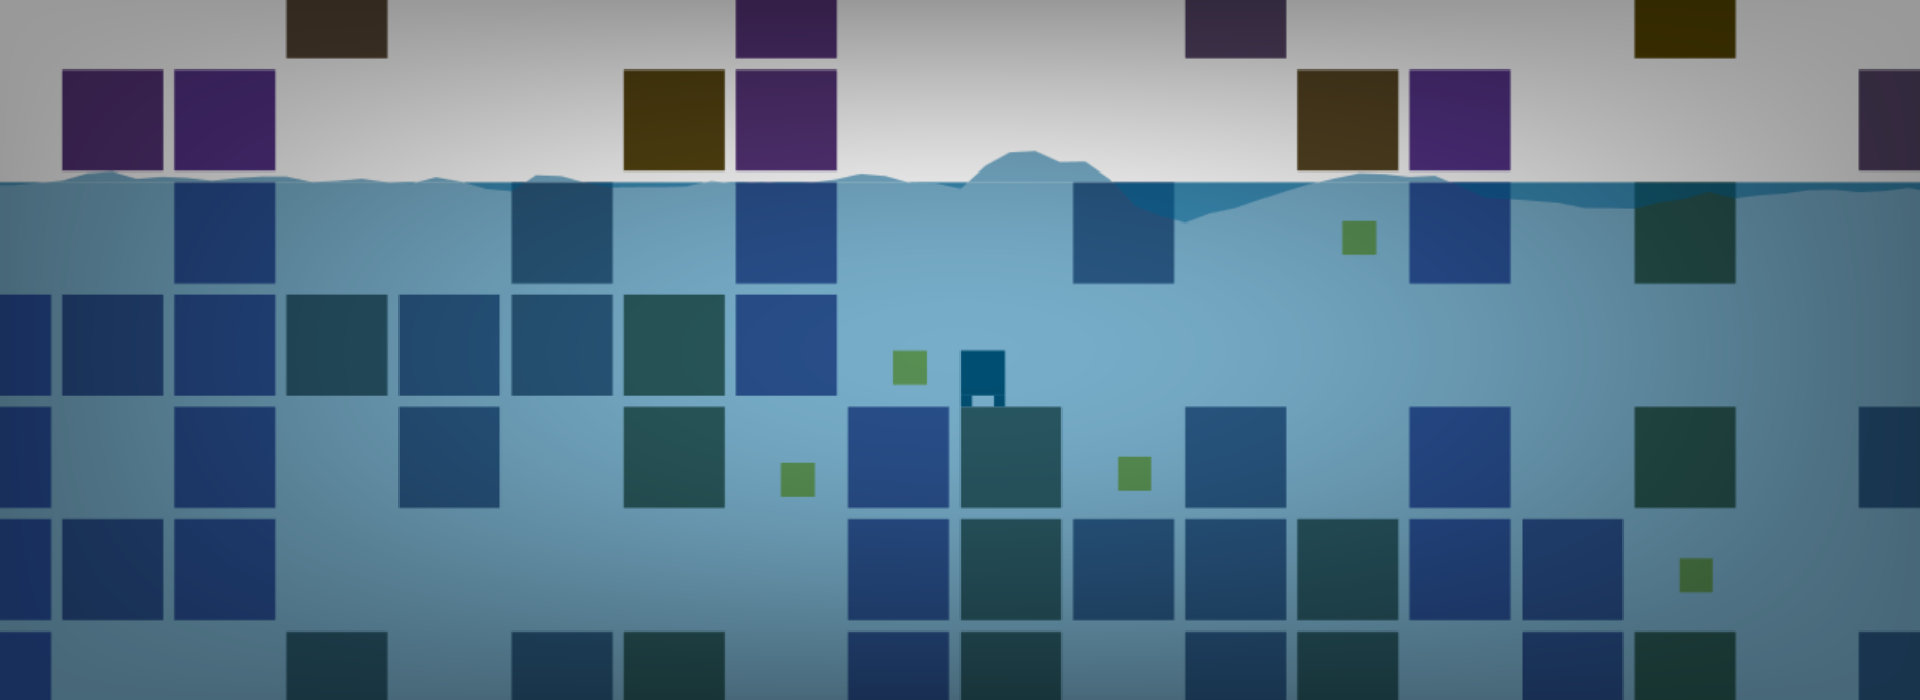
Annoyingly, the last level - where the seed is two - has given us some problems. As the screenshot shows, we have found our first unreachable coin, which is completely trapped under the rocks. Further along the level there's also a very deep hole that's impossible to jump out of.
As you can imagine, this was rather frustrating for me. I didn't really want to remake my level generation formula, because I was really happy with how it looked. The only other option was to find a seed that actually made a playable level - and to make a formula that could get to that seed. After a lot of testing, I realised the next valid level was on seed 15.
Furtunately, because levels one and two were completely valid anyway, it didn't take long to find a simple solution that worked.
Q = (Q * 14) + 1
At the very start of the game, the seed is set to zero, giving us the first level. Once the level's finished, the above equation is run. Q = (0 * 14) + 1 gives us the number 1, which is our next valid seed. Once the player has collected all the coins, running the formula again like Q = (1 * 14) + 1 will give us a grand total of 15.
The formula works, let's implement that in code.
#X.fill()

// Apply the formula by multiplying the seed and adding one every time
!K?k=[Q*=14,Q+=d=e=1]:0

#requestAnimationFrame(l)
That was a lot of work! Fortunately we've now tackled all the complicated parts of the game, leaving us the easy job of making the worlds look nice and adding a few final gameplay dynamics.
Part 5. Final Details
So far, we have created the character, added controls, figured out some pretty good collision response, created three fully-playable worlds and implemented a decent water simulation. All we have left to do is just making the worlds look a bit better and adding a level of challenge to the game.
For a start, let's make the blocks the right size. We can do that by changing the line where we draw the blocks from r(x,y,.9) to r(x,y,1).
We can also make a nice background by changing the code like below. The code also includes changes to the coins' colour, walls at the side of the level, and the addition of a temperature bar. See if you can figure it out.
#l=_=>{
#W=c.width=innerWidth-16
#H=c.height=innerHeight-16

#D=d
#E=e

#g&v?f=-.18:e+=f+=.007
#h?d-=.1:j?d+=.1:0
#z=(W+H)/25

#r=(x,y,s)=>X.fillRect((x-d)*z+W/2,(y-e)*z+H/2,z*s,z*s)

// Draw two background shades
X.fillStyle=t
r(0,0,W)
r(v=0,9,W)

#A(d,e+.5)&!A(d,e)|A(d+.5,e+.5)&!A(d+.5,e)&&(e+.5)%1<f&&(e=E,v=1,f=0) // Ground
#A(d,e)|A(d+.5,e)|A(d,e+.5)|A(d+.5,e+.5)|d<0|d+.5>70&&(d=D,A(d,e)|A(d+.5,e)&&(f=0,e=E)) // Wall and Ceiling

#e<17&!A(d,e)&a(d,e)>-1&&(k[~~d*~~e]=1)

#K=0
#for(x=70;x--;){ // Start at 70 and count down
#    for(y=30;y--;){ // Start at 30 and count down
#        X.fillStyle='#'+~(Math.sin(x)*5-543)
        // Make the coins brighter
        A(x,y)?r(x,y,.9):a(x,y)>-1&y<17&!k[x*y]&&(X.fillStyle='#ff0',r(x+.4,y+.4+Math.sin(_/50+x+K++)*.1,.3))
#    }
#}
// Walls at the edge
r(-W,0,W)
r(70,0,W)

#X.fillStyle='#034'
// Draw the temperature bar
X.fillRect(0,0,W-V*W/5e3,H/9)
#r(d,e+f,.4)
#r(d,e+.4,.1)
#r(d+.3,e+.4,.1)

#X.fillStyle='#0698'
#for(i=634;i-=2;X.lineTo((i/9-d)*z+W/2,(J[i]+13-e)*z+H/2)){
#if(!_)J.push(0,0)
#else{
#J[i]+=J[i+1]*(i>3)
#J[i+1]+=(J[i-1]+Math.sin(_*J[i+1])*.02-J[i+1])/2
#~d==~(i/9)&e>12&e<14?J[i+1]+=f/4:J[i+1]*=.97*(i<630)
#J[i+1]-=J[i]/25
#}}
#r(0,13,70)
#X.fill()

// Make the background golden if the player has completed all the levels
// Reset the temperature timer at the start of every level
// Make the temperature bar slowly get lower
// Freeze the player if he's been playing for over a minute
!K?Q>4?t='#ff0':k=[Q*=14,Q+=d=e=V=1]:++V>5e3?d=D:0

#requestAnimationFrame(l)
#}
#X=c.getContext`2d`

// "V" represents the progress of the temperature bar
d=e=g=h=j=f=v=Q=V=0

#k=[J=[]]

// Define the default background colour
t='#3897'

#P=(e,b)=>e.keyCode==38|e.keyCode==87?g=b:e.keyCode==39|e.keyCode==68?j=b:e.keyCode==37|e.keyCode==65?h=b:0
#onkeydown=e=>P(e,1)
#onkeyup=e=>P(e)

#a=(x,y)=>{x=~~x+1,y=~~y;return (Math.sin(y*x*9+Q)*6)+y-15}
#A=(x,y)=>a(x,y)>0
#l()
The temperature bar implemented above has a timer that starts at zero and counts up every frame. When this number is larger than 5000, it freezes the player.
We froze the player by writing the code d=D. This works becuase D refers the old position of our player. By setting his active position to match his old one, the code effectively makes him "freeze."
The piece of code that says Q>4?t='#ff0': is detecting when the player has completed all the levels. Once he has, t='#ff0' changes the background colour.
As mentioned earlier, there have also been some other updates in the code. I haven't explained them because they are very simple. If you're struggling to understand, the commented areas explain all the changes in detail.
Well, believe it or not, Splash Dash has been completely made from start to finish. It's been a long journey, but we finally made it! However, you may be wondering why the code looks longer than a thousand characters. That's because we haven't put it through all the packing techniques that can get games as small as possible.
Let's see how small we can get it in the final section of this article.
One Last Golf
We've come a long way. Now it's time to compress our code into the tiny limitation of 1024 characters. Fortunately, we've done all the hard work. As we've coded this game, we've tried to keep our code as simple and small as we can. The last stage is handing our code over to a machine and see what it spits out.
There are a lot of JavaScript minifying tools out there. One I've found especially good is a tool called "Terser Online," a simple compilation of two very useful minification tools. I pasted our JavaScript code in the box and it has given us something over 1000 characters smaller.
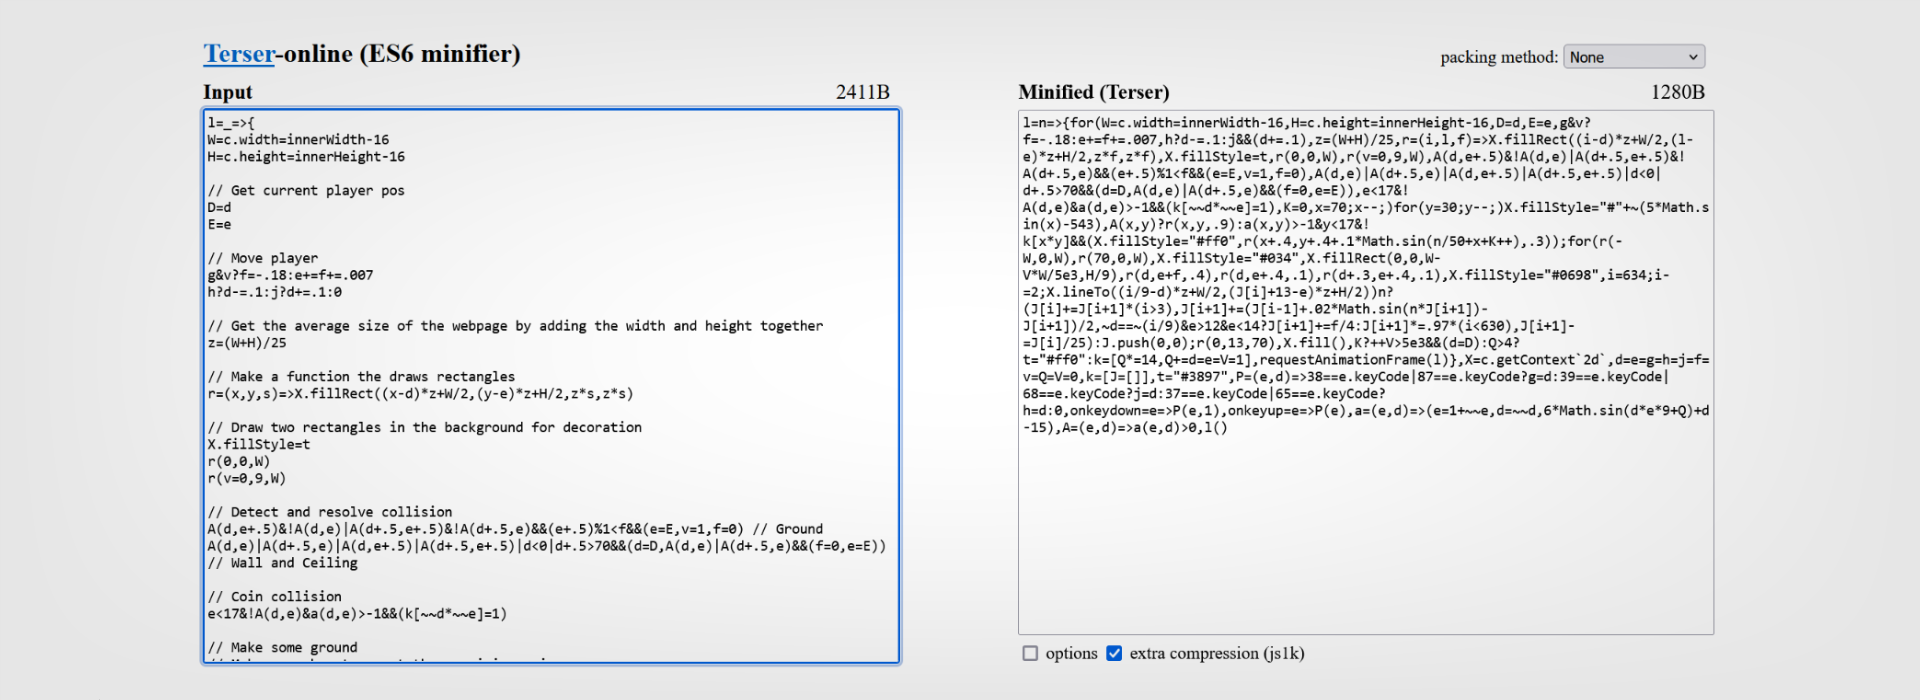
How did it do that?! Essentially, terser removes anything that's pointless. This can include whitespace, new lines, and a few other things that are all there for the simple purpose of making code easier for us to read.
Whitespace is the space between our text or code that makes it readable. Computers don't need any of this "whitespace" to run a program, because they don't care about aesthetics. Interestingly however, some spaces are vital for the computer to interpret, so tools like Terser have to detect which ones to remove.
But the byte size still isn't small enough! Thankfully, Terser Online also includes a feature called "Regpack," which was made by Siorki. Let's see how small we can go!
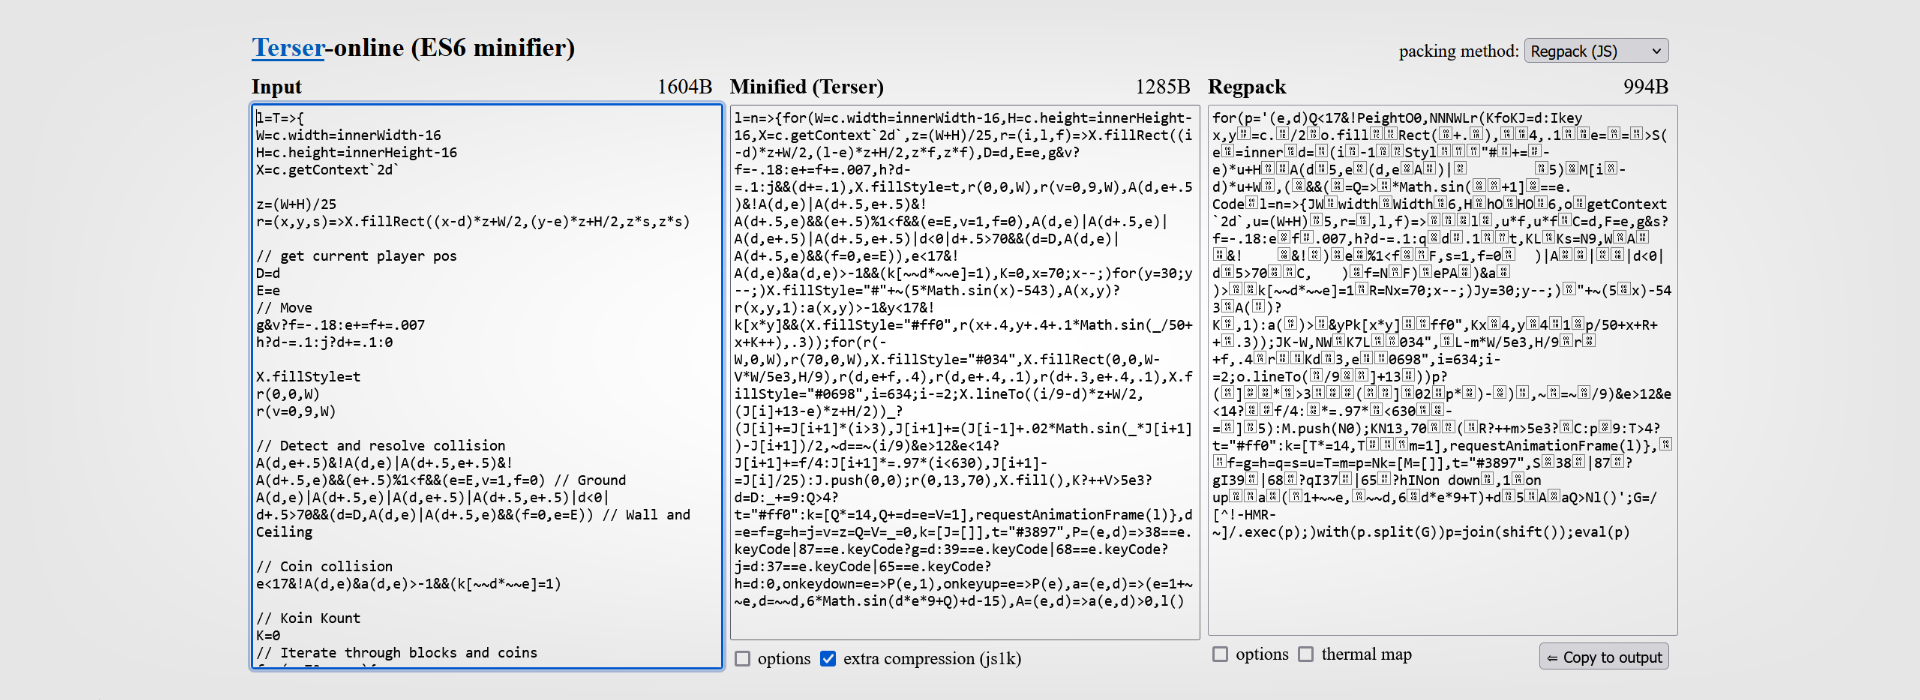
From that lengthly code we had at first, we've been able to save more than 1400 characters. At the moment we're just using JavaScript, so let's add our HTML back in like we discussed in the outset.
<canvas id=c><script>for(p='(e,d)Q<17&!PeightO0,NNNWLr(KfoKJ=d:Ikey x,y =c.
/2
o.fill
Rect(+.),4,.1e==>S(e=innerd=(i-1
Styl"#+=-e)*u+H
A(d5,e
(d,e
A
)|
5)M[i-d)*u+W
,(&&(=Q=>*Math.sin(+1]==e. Codel=n=>{JW
widthWidth6,H
hOHO6,o
getContext`2d`,u=(W+H)
5,r=,l,f)=>l,u*f,u*fC=d,F=e,g&s?f=-.18:ef.007,h?d-=.1:qd.1t,KLKs=N9,WA
&! &!
)e%1<fF,s=1,f=0 )|A
|
|d<0|d5>70C, )f=NF)ePA
)&a
)>k[~~d*~~e]=1R=Nx=70;x--;)Jy=30;y--;)"+~(5x)-543A( )?K ,1):a( )>&yPk[x*y]ff0",Kx4,y41p/50+x+R++.3));JK-W,NWK7L034",L-m*W/5e3,H/9r
+f,.4r
Kd3,e0698",i=634;i-=2;o.lineTo(/9]+13))p?(]*>3(]02p*)-)
,~=~/9)&e>12&e<14?f/4:*=.97*<630-=]
5):M.push(N0);KN13,70
(R?++m>5e3?C:p9:T>4?t="#ff0":k=[T*=14,Tm=1],requestAnimationFrame(l)},f=g=h=q=s=u=T=m=p=Nk=[M=[]],t="#3897",S38|87?gI39|68?qI37|65?hINon down,1on upa(1+~~e,~~d,6d*e*9+T)+d5AaQ>Nl()';G=/[^!-HMR-~]/.exec(p);)with(p.split(G))p=join(shift());eval(p)</script>
Admittedly, getting the above code to fit into 1024 characters took some tweaking. I needed to go back and change a few practices we used earlier on and rename some variables. The hardest part of code golfing is always the end, where even moving a letter from one part of your code to another can save bytes.
That was a very long article, but I hope it helped you understand how games like this are made. If there's any part you did't understand or need help with, please tell me about it in the comments!
All comments are reviewed before being posted. No contact details or other personal information will be shared.
If there's anything else you don't want published, please say so in the comment.
Thanks for your feedback!

