Snakes And Ladders Talk Through: Level Generation
Each level in the game Snakes And Ladders is completely different every time. The code for this is - as you can imagine - very overwhelming. In fact, it's the most complicated piece of code in the entire game. Ironically, it also happens to be the most interesting part... well, in my mind anyway. So let's plough on regardless.
Set up
To begin the level generation, we need to start by making a list that stores the current level. We can do this by constructing an array.
this.array = [] // an array that stores the level
this.width = 100 // the amount of columns
this.height = 100 // the amount of rows
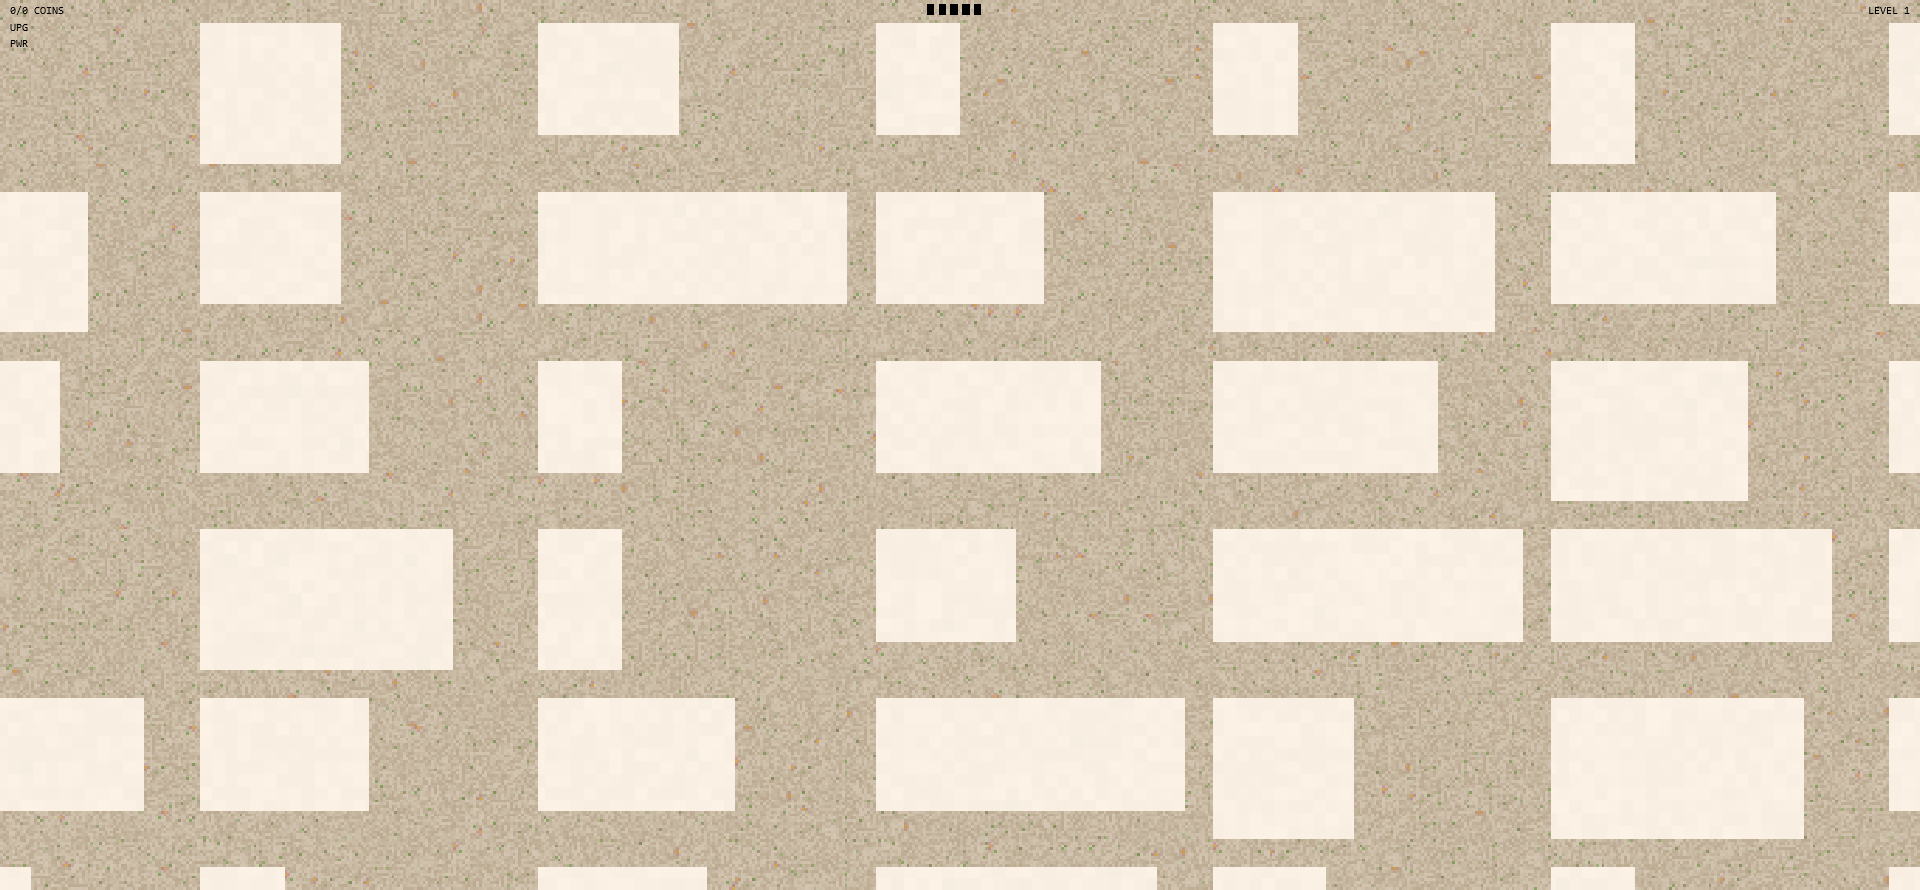
The first thing to do to our array is to completely fill it with blocks, which we can mine out later. In the code snippet below, a "block" is represented by 1.
// iterate through the amount of blocks in the world
for (let i = 0; i < this.width * this.height; i ++) {
    this.array.push(1) // fill the level with blocks
}
To draw the blocks, you can write code similar to this:
// set the scale
const block_size = 50

// iterate through every square in the level
for (let x = 0; x < this.width; x ++) {
    for (let y = 0; y < this.height; y ++) {
        const block = this.array[x + y * this.width]

        // draw it if the current square is a block
        if (block == 1)
            ctx.fillRect(x * block_size, y * block_size, block_size, block_size)
    }
}
That's all you need to set up the map. Now we can start carving bits away!

Chambers
The next stage is to start mining rooms. Each chamber has a random width and height, and is positioned in a grid. Store the chambers in an array, so that the computer can know where to place the tunnels and actors later on.
¬this.array = []¬
this.chambers = [] // make an array that stores the chambers
¬this.width = 100
this.height = 100¬
In the code below, 0 refers to plain air.
// this code makes a single chamber.
// note that chamber x, y, width and height have already been defined.

for (let x = chamber_x; x < chamber_x + chamber_width; x ++) {
    for (let y = chamber_y; y < chamber_y + chamber_height; y ++) {
        this.array[x + y * this.width] = 0
    }
}
Tunnels
Making the tunnels is a tricky part, so I will just give you a simplified overview. To begin, we need to know how each chamber should be connected. I went for the Binary Tree maze algorithm, which - in case you're wondering - is the simplest procedural maze ever. This is how it works:
∙ Starting at the top left corner, connect your chamber to either:
∙ The chamber on the right
∙ The chamber underneath
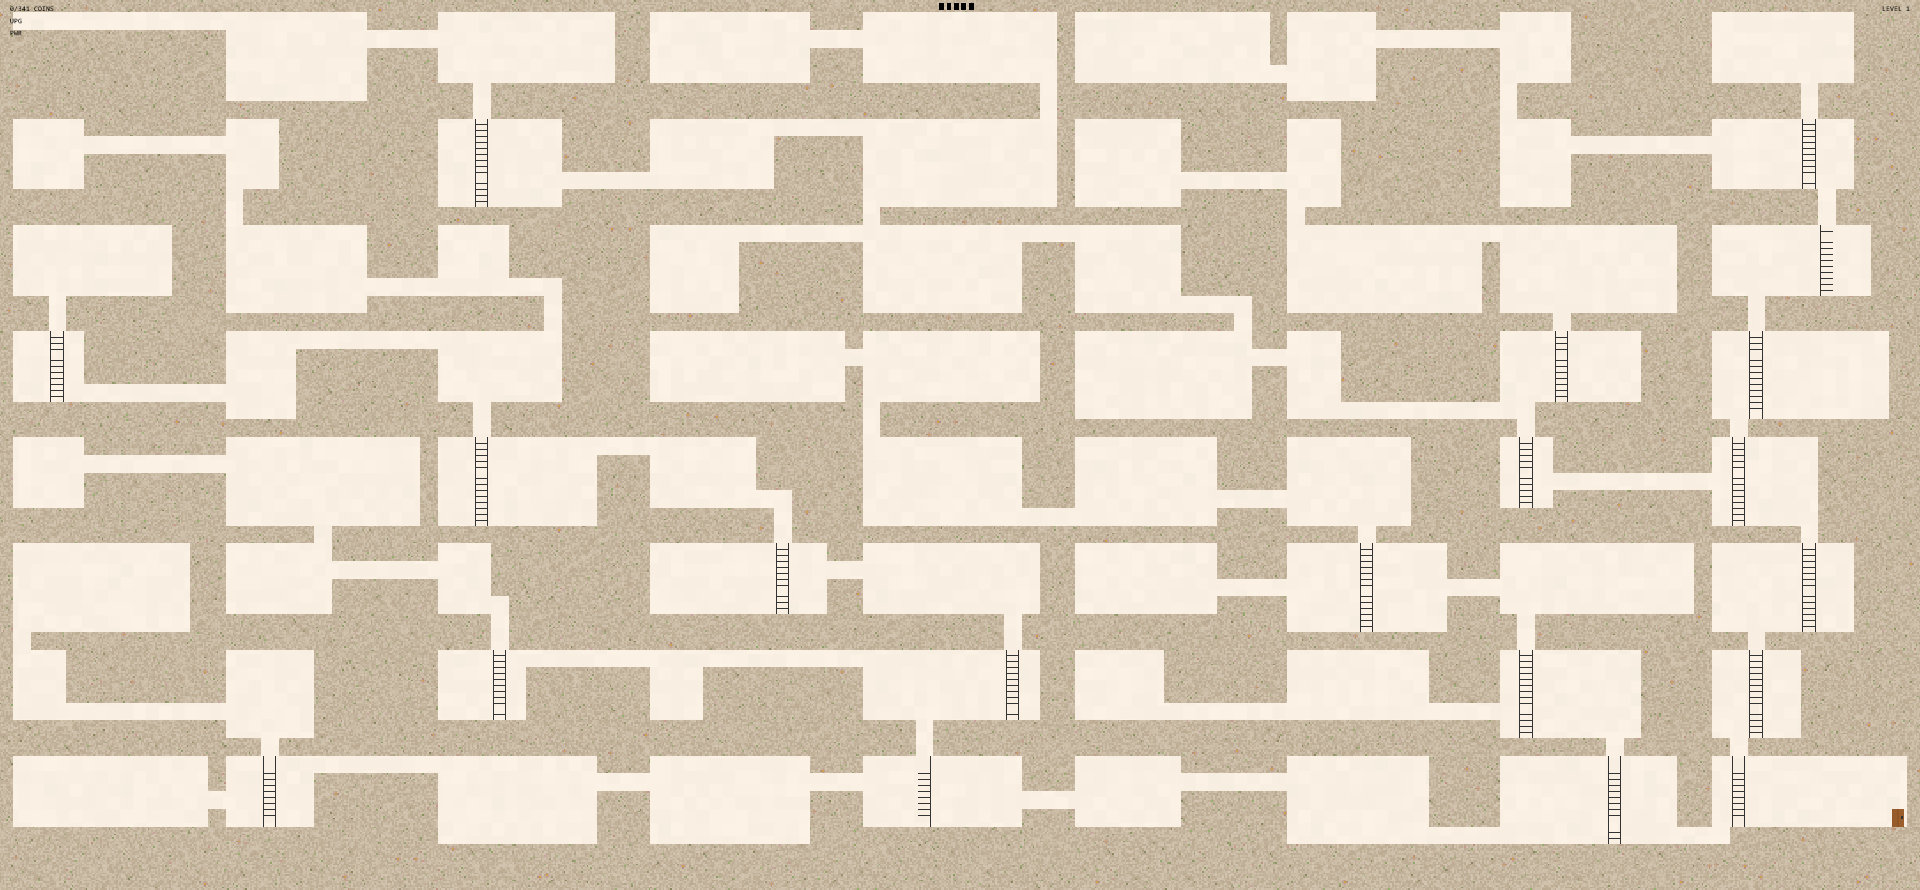
With these rules applied, the maze should start to be taking shape. Note how the passages seem to point towards the bottom right corner:
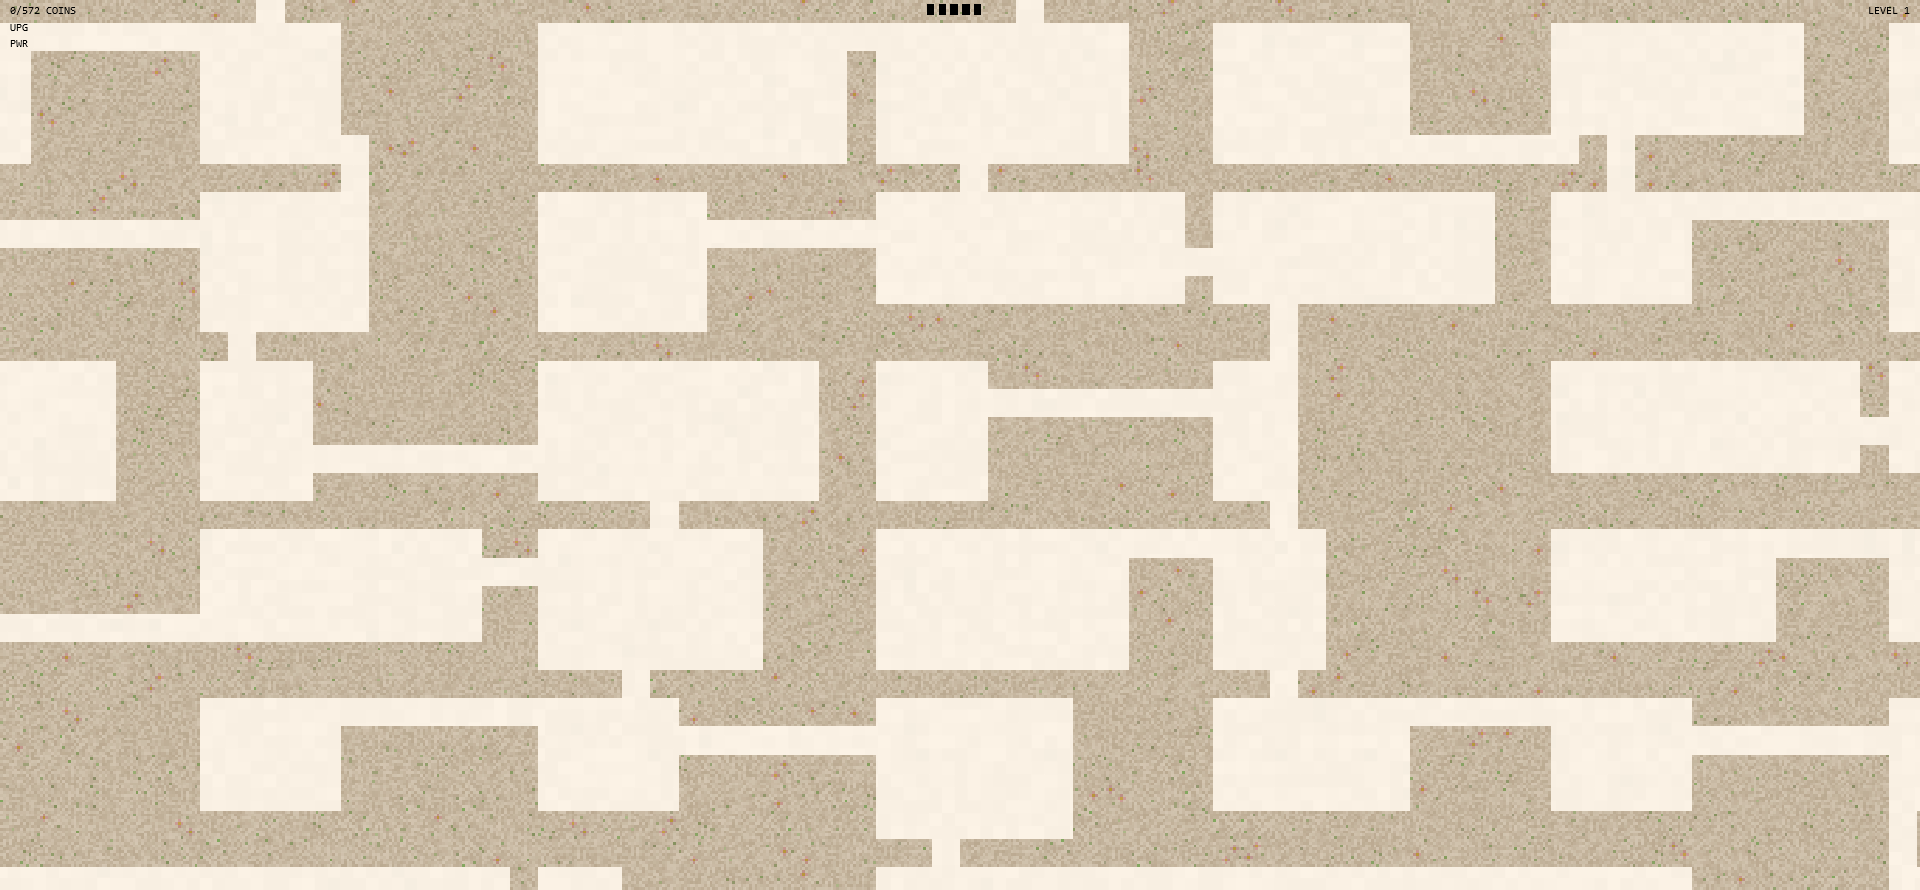
You may notice a problem. The thing is, if we just stop here, some channels may never connect. The way to fix this is to cut a long channel through the right and bottom edge, and that solves the problem.
Ladders
The next thing to add is ladders. This took a very long time for me to get right, but in the end the solution turned out to be really simple: Let's say a chamber decides to connect itself to the one beneath it. To help me explain, let's call the first chamber Jeff and the second chamber Andrew.
A tunnel emerges from the base of Jeff and snakes its way down. At the moment, the tunnel stops as soon as it touches Andrew's head, but let's change that rule. Let's make it so that the tunnel has to proceed through Andrew's body untill it reaches the ground. This may sound pointless, as the tunnel would just be mining through plain air, but it means that we are able to start building a ladder.
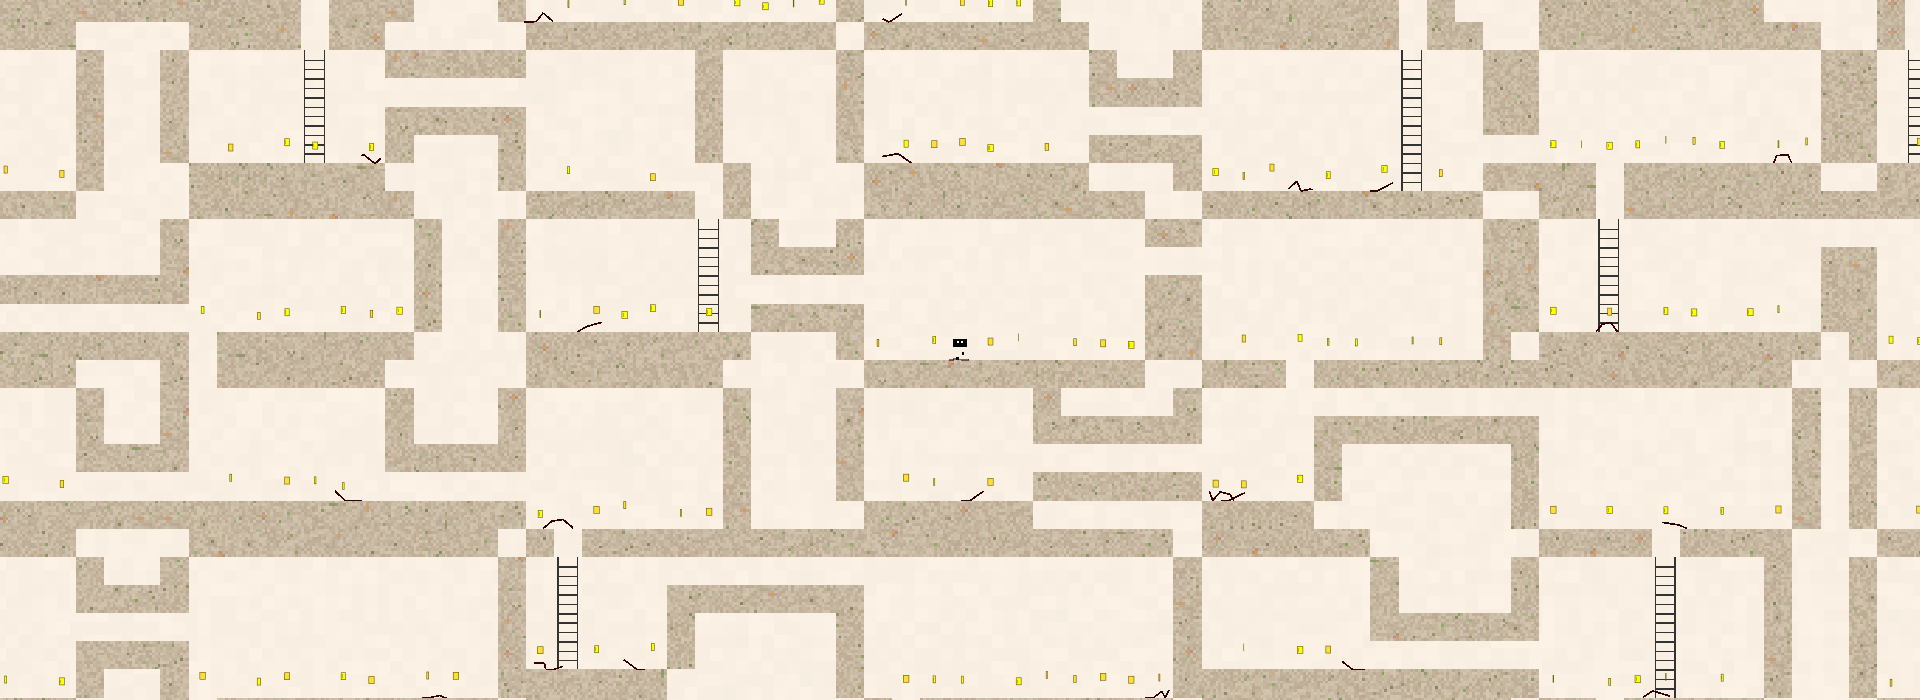
Let's add a new rule: If the tunnel finds itself mining though Andrew's body, add a ladder block behind it. This new rule means that ladders will only be generated inside chambers and it also means that Drillo will be able to get into rooms that he couldn't before.
Reverse generation
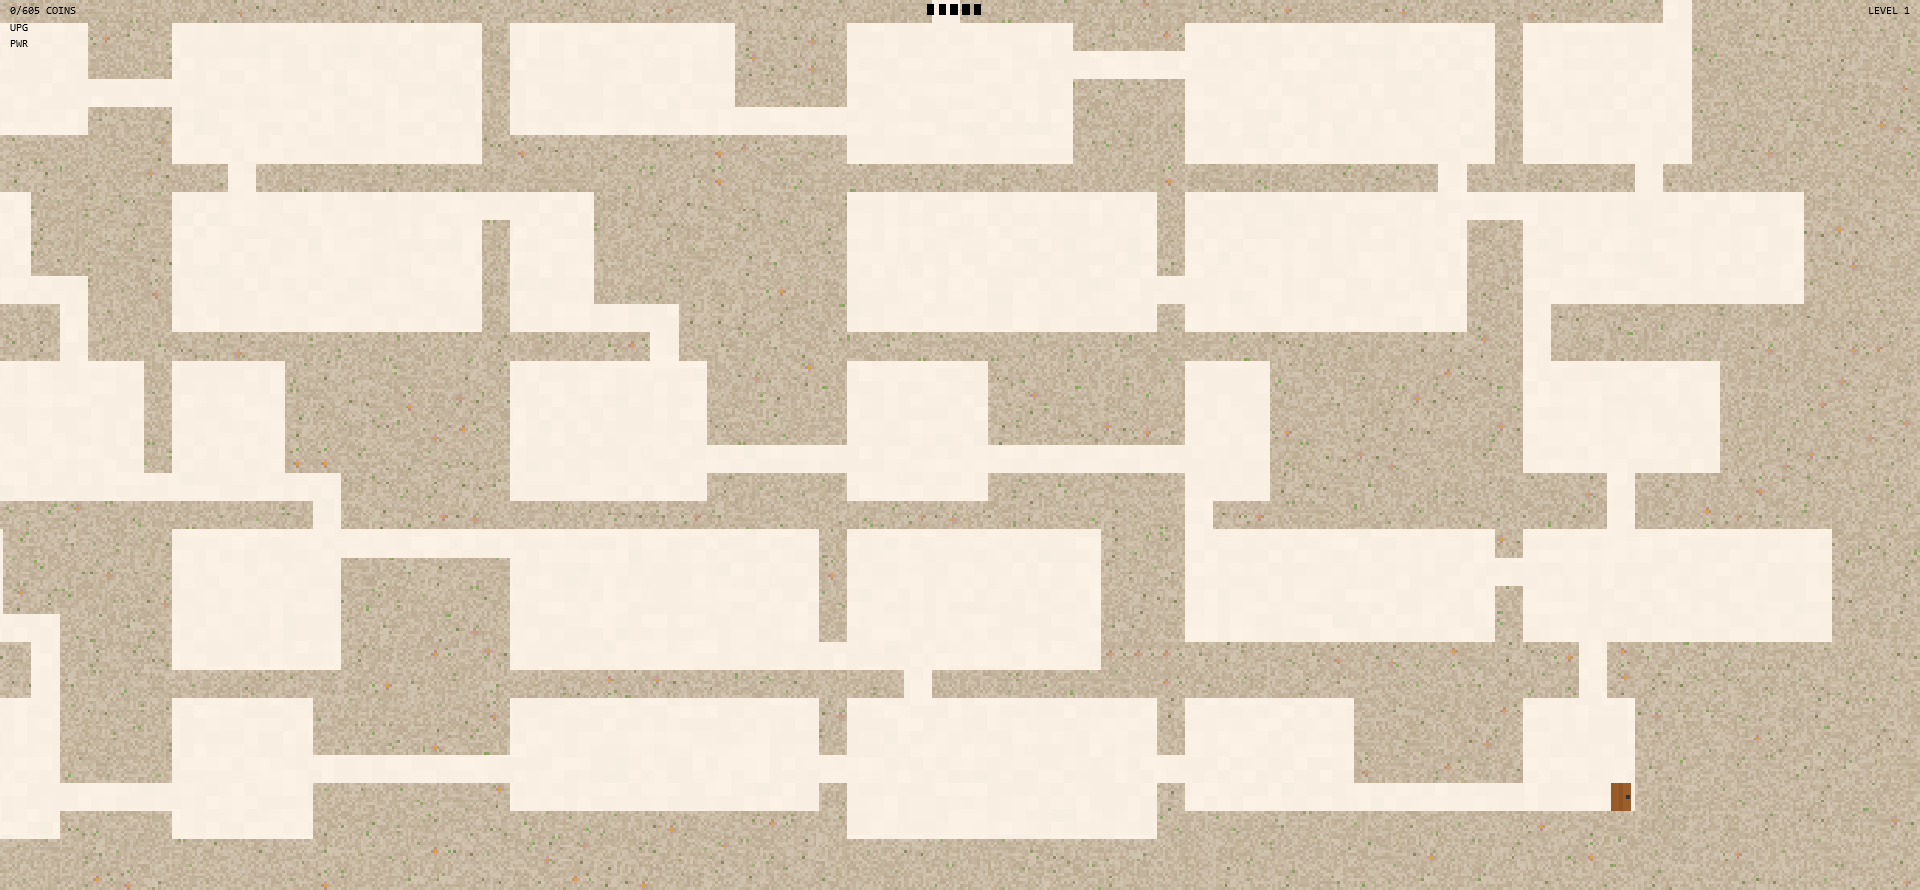
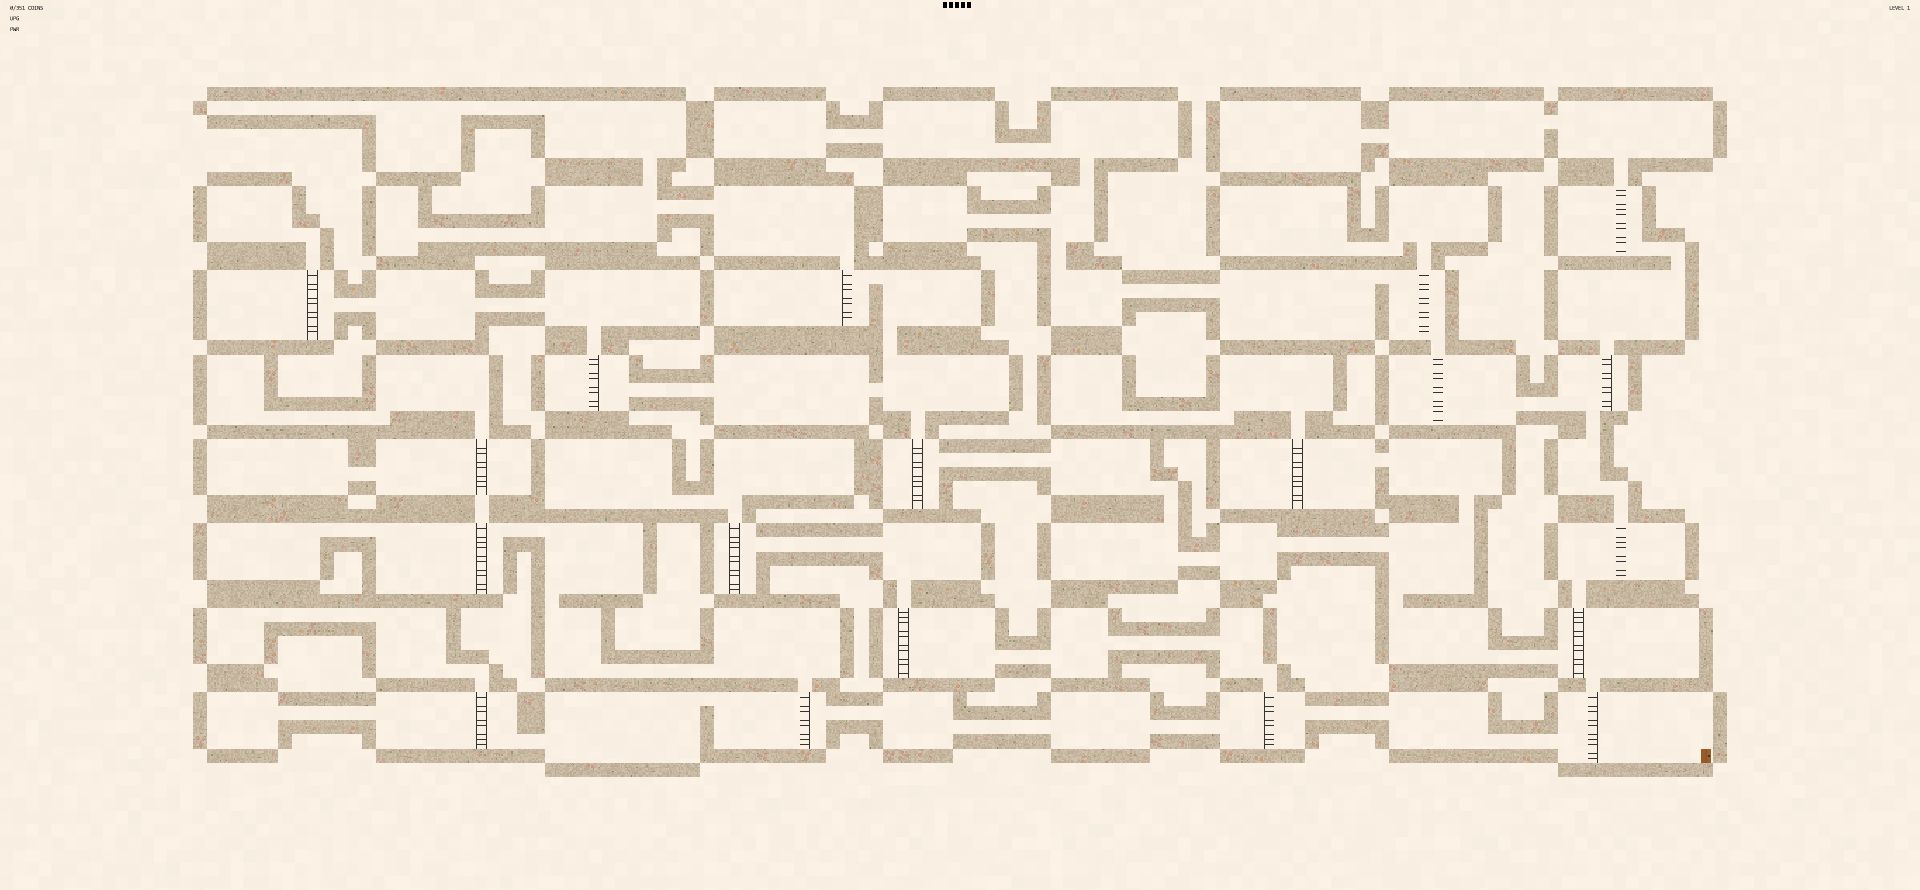
As you can see, the world still looks very different from the real game. What we are missing is reverse generation - a final "filter" that removes the pointless blocks. At the end of the generation code, I run through every block in the level and do the following:
∙ Turn the current block into thin air
The advantage of this final filter is it speeds up in-game performance, it makes the level look better (in my opinion), and it also gives the world a vast feeling of nothingness - meaning the player is not able to see the sharp boundaries of the map.
Side effects
This final section briefly discusses how each side effect is placed in the level and how the level adapts to them. To set everything up, put a side effect in each chamber, making sure that it does't get dropped above a tunnel hole.
If you played the game, you may have noticed the average size of each chamber grew as the game went on. This is because the size for each side effect is stored from the start. It means that the computer can know exactly how big its chambers should be for the current level.
In the game, there's a function called getLevelEffects(), which returns an array of all the enemy types for the level.
You may notice that the largest side effects always come first in the array. The reason for this is it means that when the map is being generated, it can take the size of the biggest side effect into consideration. It can thus make sure that its minimum chamber width and height is way larger than the recorded enemy.
You can learn more about the enemies of Snakes And Ladders in the next article of this series.
That's it for this article, I hope it clarified things for you and maybe it will come in handy for projects in the months to come!

